Helping a Patient Purchase a Procedure Voucher
This guide is for hospital and other provider employees who help patients find and purchase the procedures they need on Tendo Marketplace. This includes office managers for a physician; scheduling, pre-registration and registration staff; lab technicians and other staff.
The order in which you complete the following tasks will vary depending on your facility’s workflow, at what point in the patient’s care journey you help them find a procedure, and whether they agree to purchase it on the spot or later.
Registering a Tendo Marketplace Patient
Before Registration
- Register the patient in the patient accounting system/Electronic Health Record (EHR), listing the MDsave payer code as the patient’s primary insurance for every procedure that has a Tendo Marketplace voucher associated with it. Do not use commercial billing for patients using Tendo Marketplace.
- Do not load a secondary insurance into the patient’s account when Tendo Marketplace is the primary payer.
- For Medhost/HMS, set the Retain Payer History (RPH) flag to Y. This allows other insurance to be carried forward in future encounters with this patient.
- At scheduling, pre-registration or registration, if the patient has Medicare or Medicaid and that payer will cover the procedure/test, contact the Tendo Marketplace team to cancel the procedure and refund the patient.
Registration
-
When registering a patient who presents a Tendo Marketplace voucher or voucher number at their appointment, enter the voucher number as the policy number and in the Precertification/Treatment Authorization field.
Log in to your Tendo Marketplace account and click the VOUCHERS tab.
Search for the patient’s voucher by:
- Voucher number, patient account number, patient name, or procedure
- Or Availability status - Available, used, canceled, overdue (unused for 30 days)
- Confirm that the procedure listed on the patient’s voucher record matches the service performed. To do so, check the patient's name, date of birth, phone number or email. Then verify that the voucher matches the physician's name, procedure, and CPT® codes. If it doesn’t match, don’t redeem the voucher. Instead, contact the Tendo Marketplace Support Team at 844-256-7696 or support@tendo.com to update the voucher to the correct procedure. Tendo will work with the patient and, in the case of a Care Connect voucher the care navigator, to purchase the correct voucher.
- When you register patients, provide a group ID and member ID similar to those of a traditional payer. This is particularly important if your organization uses claims, as Tendo can use these identifiers to match claims and vouchers more easily. Also update the patient name under the Edit Patient Info link on the voucher in the Tendo Marketplace application to match the patient’s actual name to ensure proper claim/voucher matching.
From this point on, the process for voucher redemption is different for faciities that use automated claims for Tendo Marketplace payment vs. facilities that redeem vouchers manually:
Redeeming a Voucher When Your Facility Uses Automated Claims
When your facility uses automated claims, you do not need to redeem vouchers or enter any CPT® codes or diagnostic codes because that is done automatically. Don't click the Redeem buttons on vouchers because this could interfere with the claims process.
Redeeming a Voucher Manually
Redeem the voucher by clicking the REDEEM button on it or select multiple vouchers for the patient and click the REDEEM MULTIPLE button. This tells Tendo Marketplace to remit payment for the service. Payment is remitted to your facility only upon redemption of the voucher.

- On the popup that appears, select a Service Date - the date that the services were rendered.
- Enter the EHR or Visit Number. This is the patient account number found in your patient accounting system for that service date.
- You may be required to enter the CPT® and diagnosis codes for the procedure.
- Click SAVE

Helping a Patient Purchase a Procedure
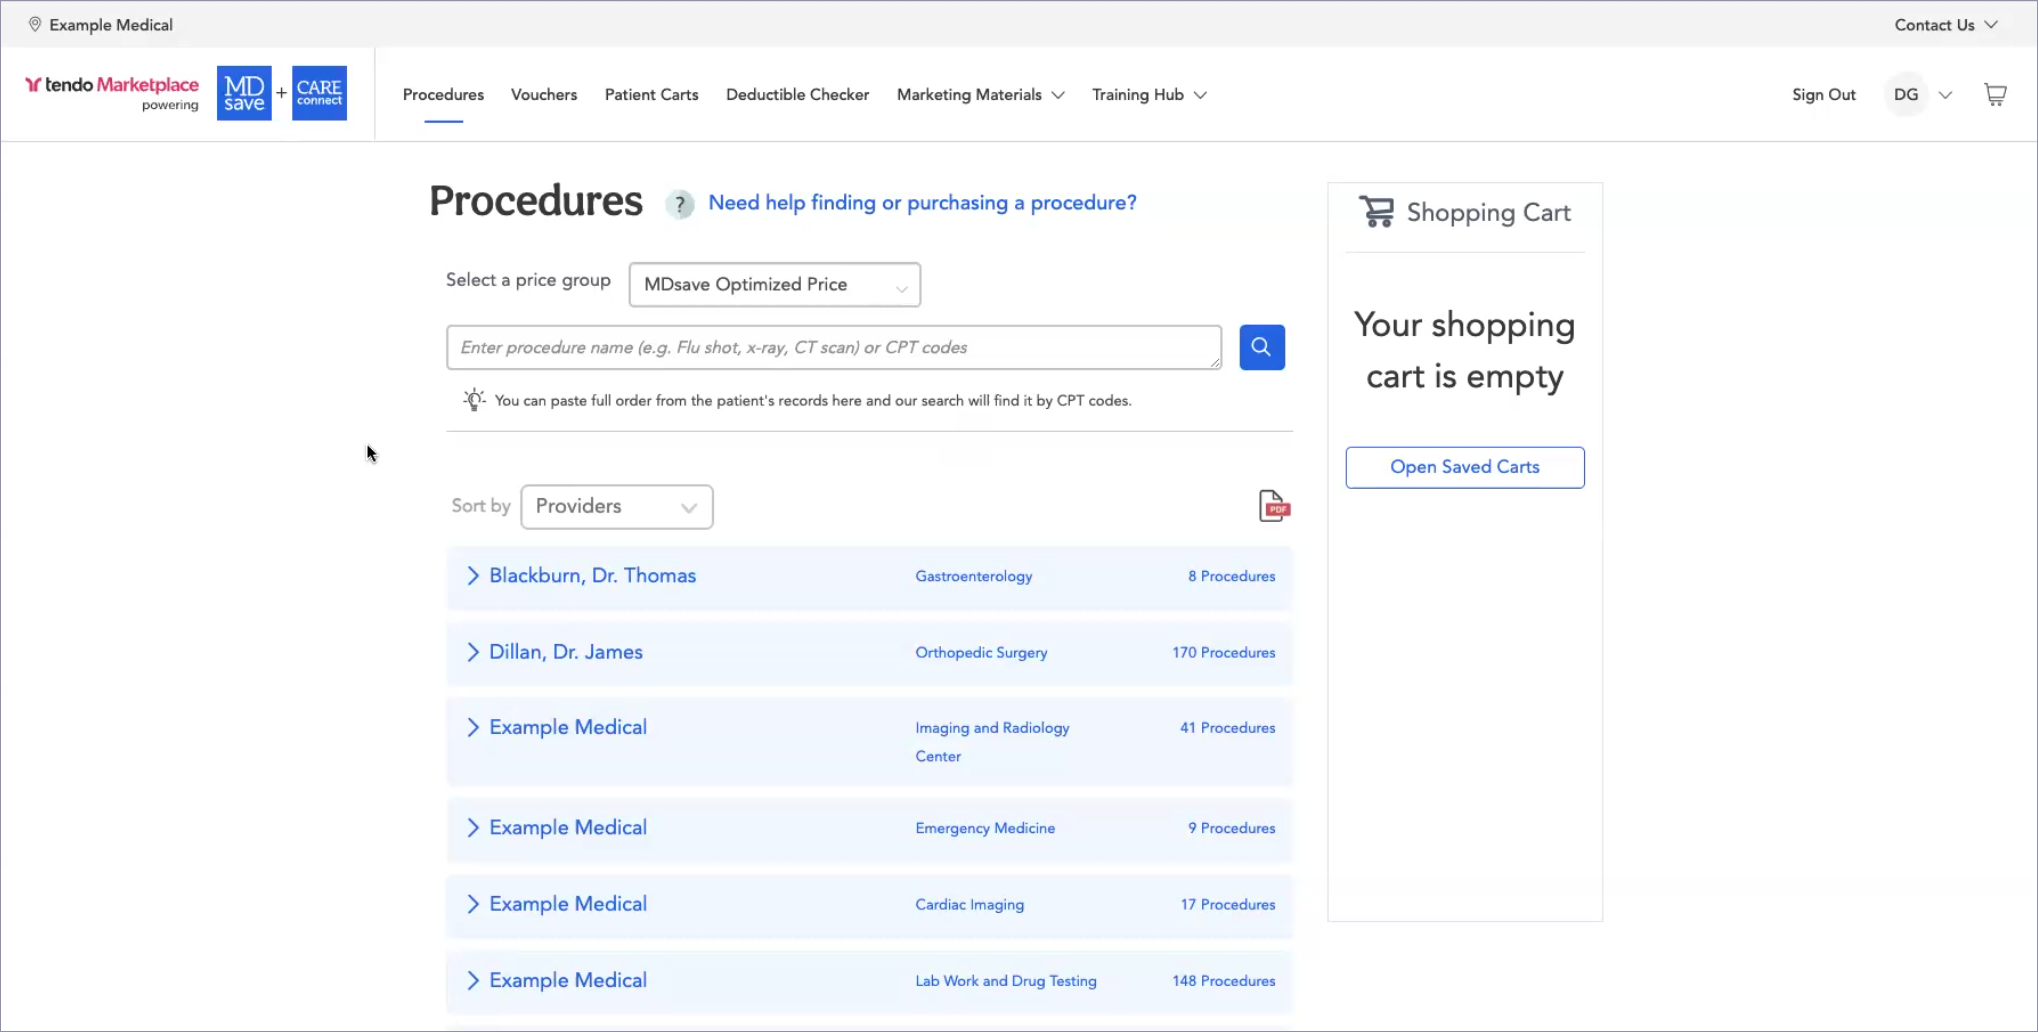
If a patient has not purchased a procedure before Pre-registration or Registration and is self pay, their insurance has declined to pay for their procedure, or they have a high deductible, offer to help them purchase a Tendo Marketplace voucher for their procedure. If they agree, log into your facility’s portal on the Tendo Marketplace. Make sure the Procedures tab is active. This is where you will help patients shop for and purchase a voucher or vouchers.
Access to Accounts
In most cases, you will have access to one facility, and its name will display in the top left corner. If you have access to more than one facility, you can switch from one facility account to another at the top left.
Select a Price Group
A Price Group is a group of offerings (i.e. providers, procedures, and prices) that are available to particular users. Different price groups have different rates for procedures that are provided to different groups of patients. Tendo works with your hospital to associate it with one or more price groups.
Most facilities use the default price group, which is the MDsave Optimized Price. If your facility doesn’t use this price group, click in the field next to Select a price group and choose the correct price group from the dropdown.
Global Employer procedures are available to employers on Care Connect for hospitals that don’t list procedures publicly.
Flat Rate Price (Facility Only) are price groups that provide only the facility’s cost because the hospital wants to use Tendo Marketplace to collect their facility fees from patients, but another independent party such as an anesthesiologist or physician group that is involved in the same procedure does not include their prices in Tendo Marketplace bundles.
Finding a Procedure for a Patient
Search for procedures in one of these ways:
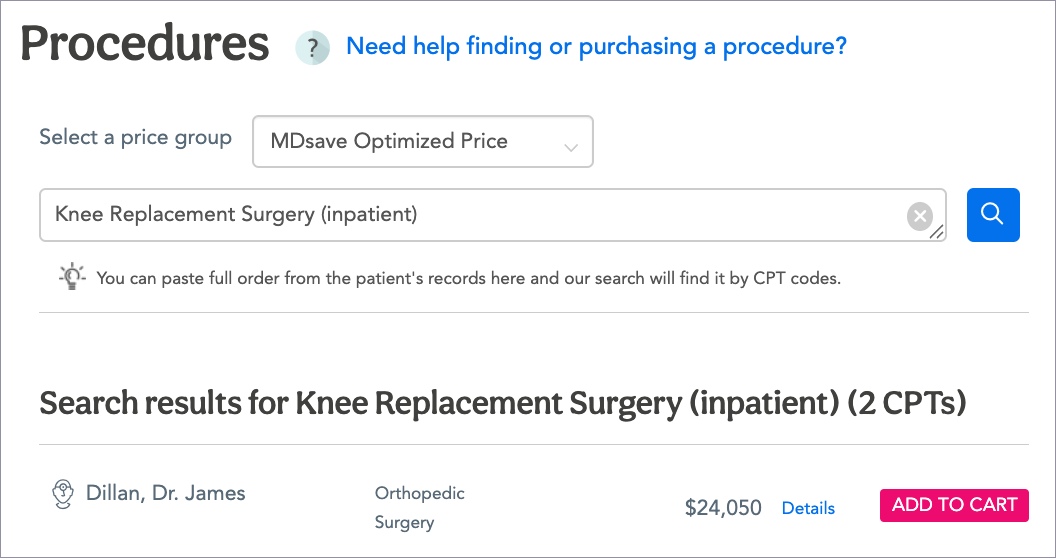
- Single Procedure - Enter the procedure name or CPT® code in the search bar and select from the choices that appear in the dropdown menu.
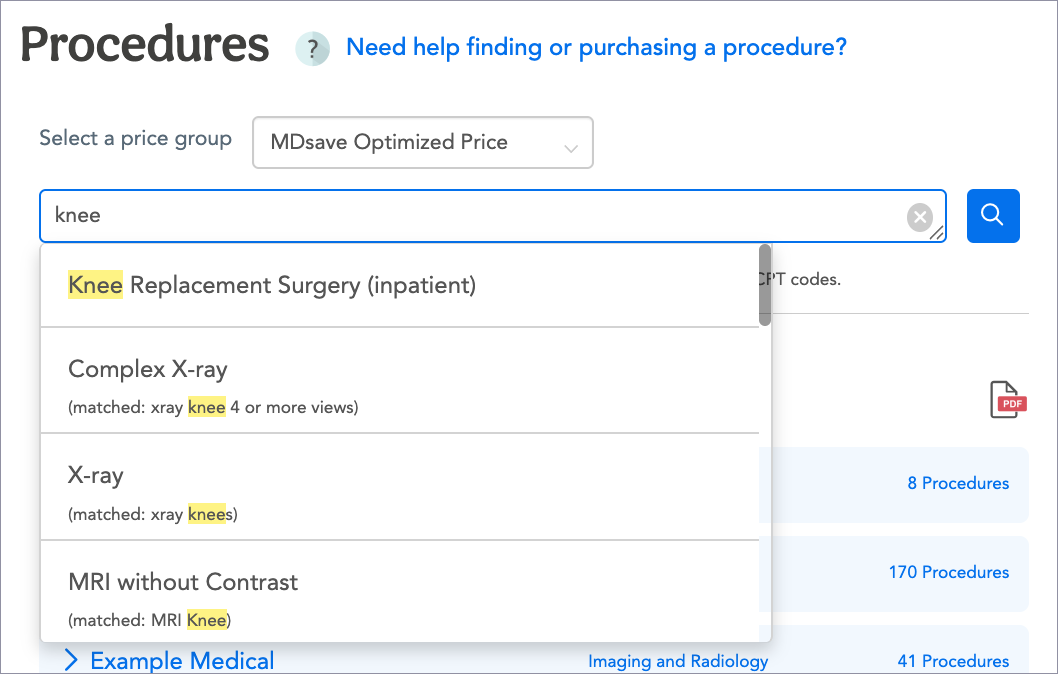
A list of providers who offer this procedure and the cost will display.
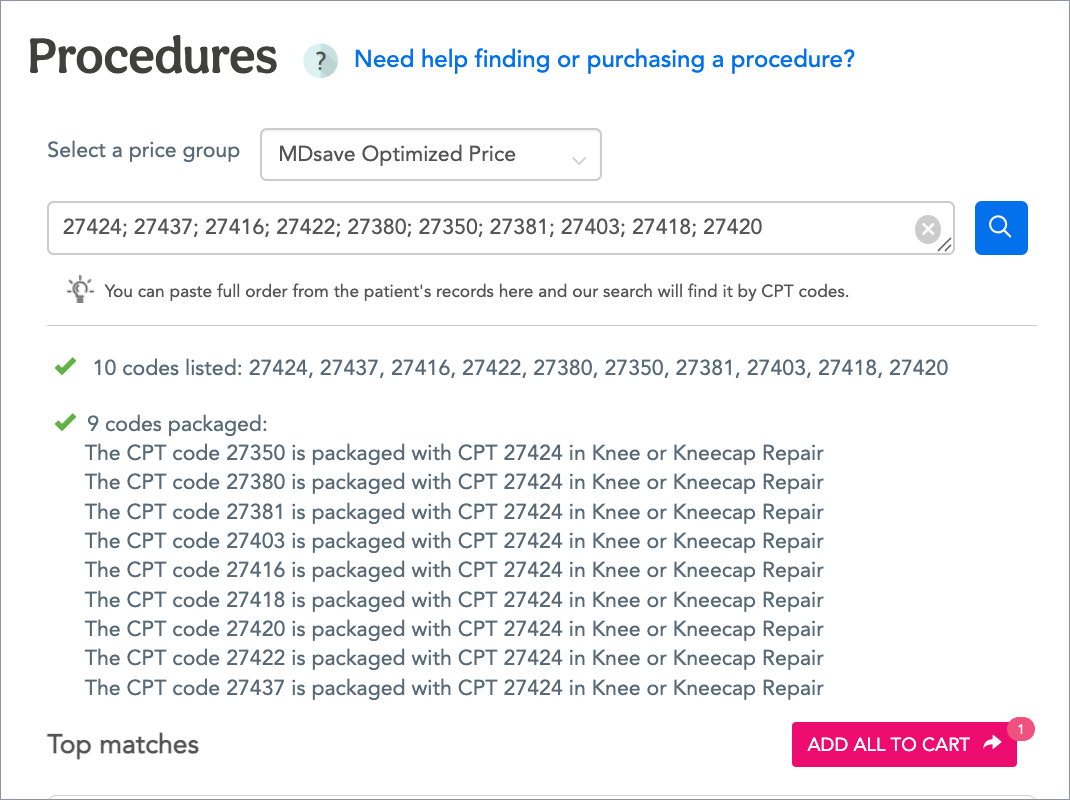
- Multiple Procedures - You can copy the physician’s order with the CPT® codes from the Electronic Health Record (EHR) and paste it in the search bar. The system will find procedures that are related to the CPT® code so that you can tcan choose one.

You also can paste multiple CPT® Codes into the search field.
Sorting
Alternatively, you can sort by Specialties, Procedures or Providers, then browse for the one you want.

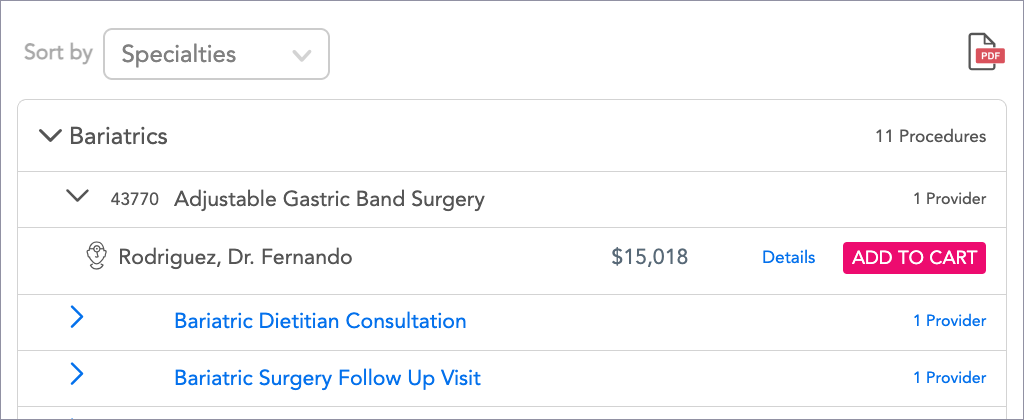
Specialties
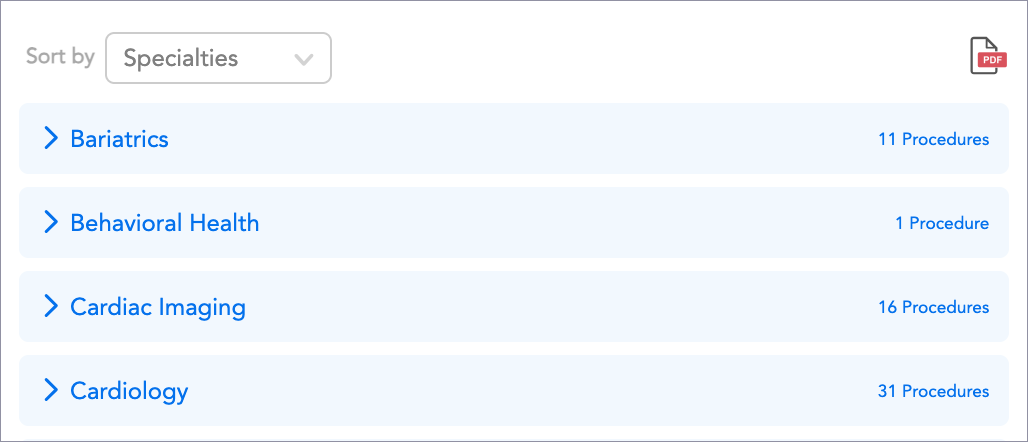
Click the arrow to the left of each specialty to see a list of procedures under it. Click the chevron to the left of a procedure to see the CPT® code, procedure name, number of providers who offer it, the providers' names, and the cost.
Procedures
When you select procedures in the Sort by dropdown, a list of procedures will display. Click DETAILS to see more about a procedure.
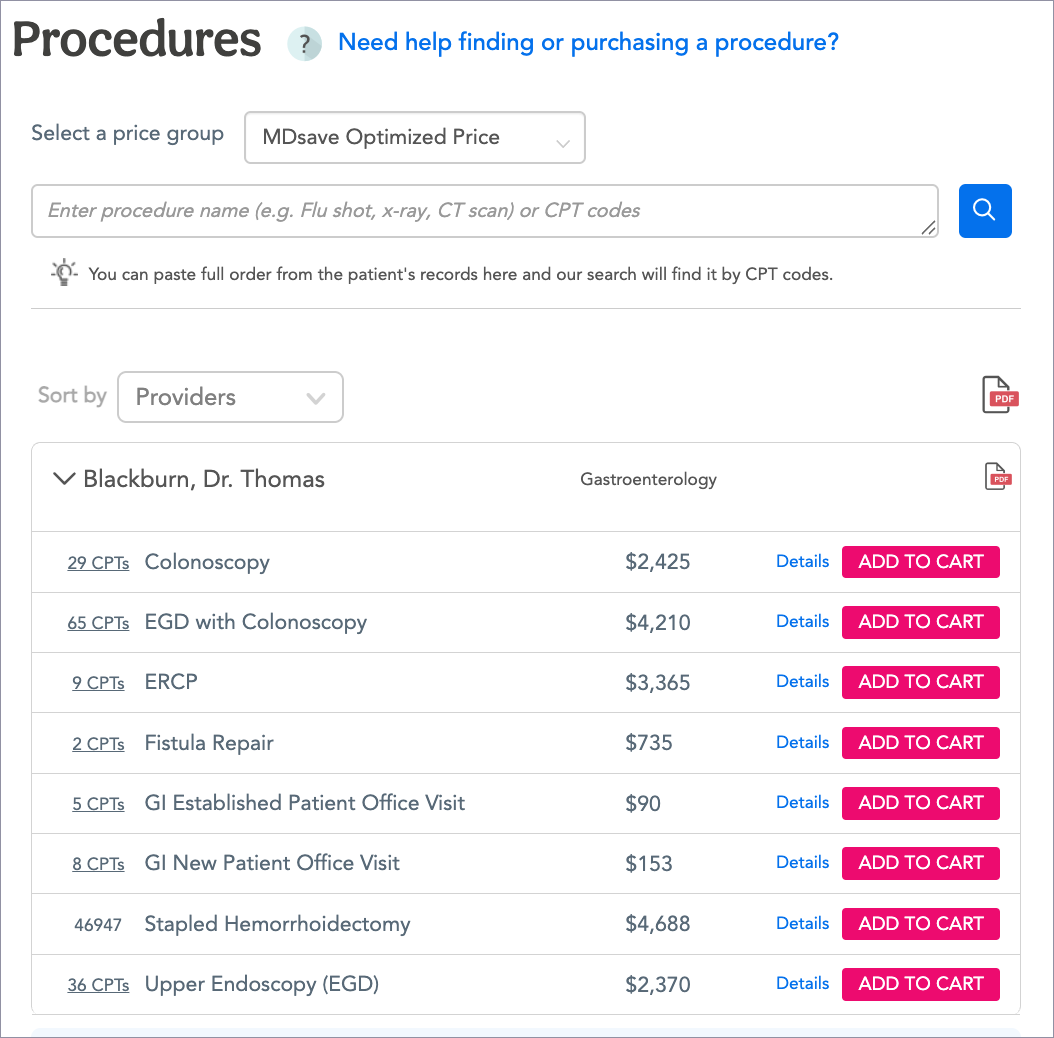
Providers
When you sort by providers, a list of providers with their specialties will display. Click the arrow to the left of a provider’s name to display a list of their procedures and the prices for them.
Note: You can export a pdf of multiple providers' price sheets by clicking the PDF icon on the right of the Sort by field, or a pdf of a single provider’s price sheet by clicking the PDF icon to the right of the provider’s name. In either case, a popup will appear on which you can select items and/or edit fields before exporting the pdf. Then click DOWNLOAD.
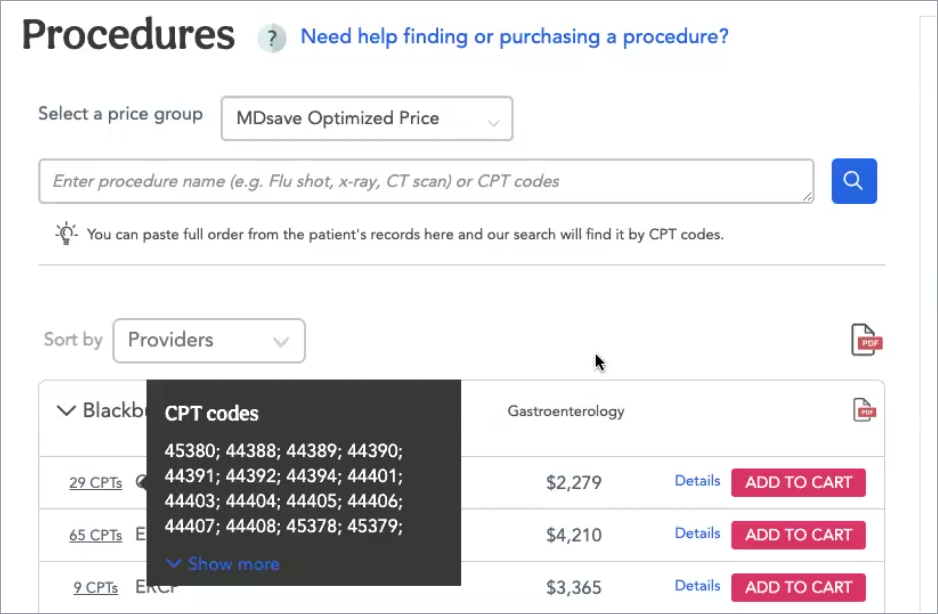
View CPT® Codes for a Procedure
To view CPT® codes that are included in a procedure bundle, click the CPT® link on the left of a procedure row.
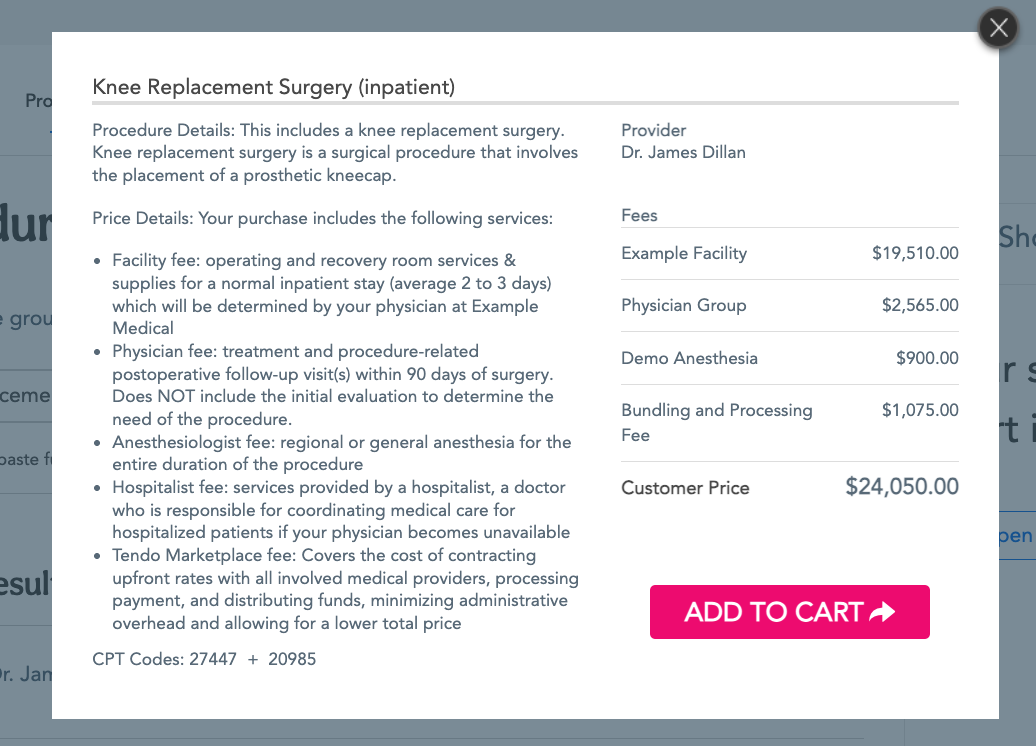
Click Details to see more information about the procedure. A popup will display a description of the procedure and included services, the provider’s name, fees for providers who are involved in the procedure, MDsave’s bundling and processing fee, and the total customer price.
Add to Cart
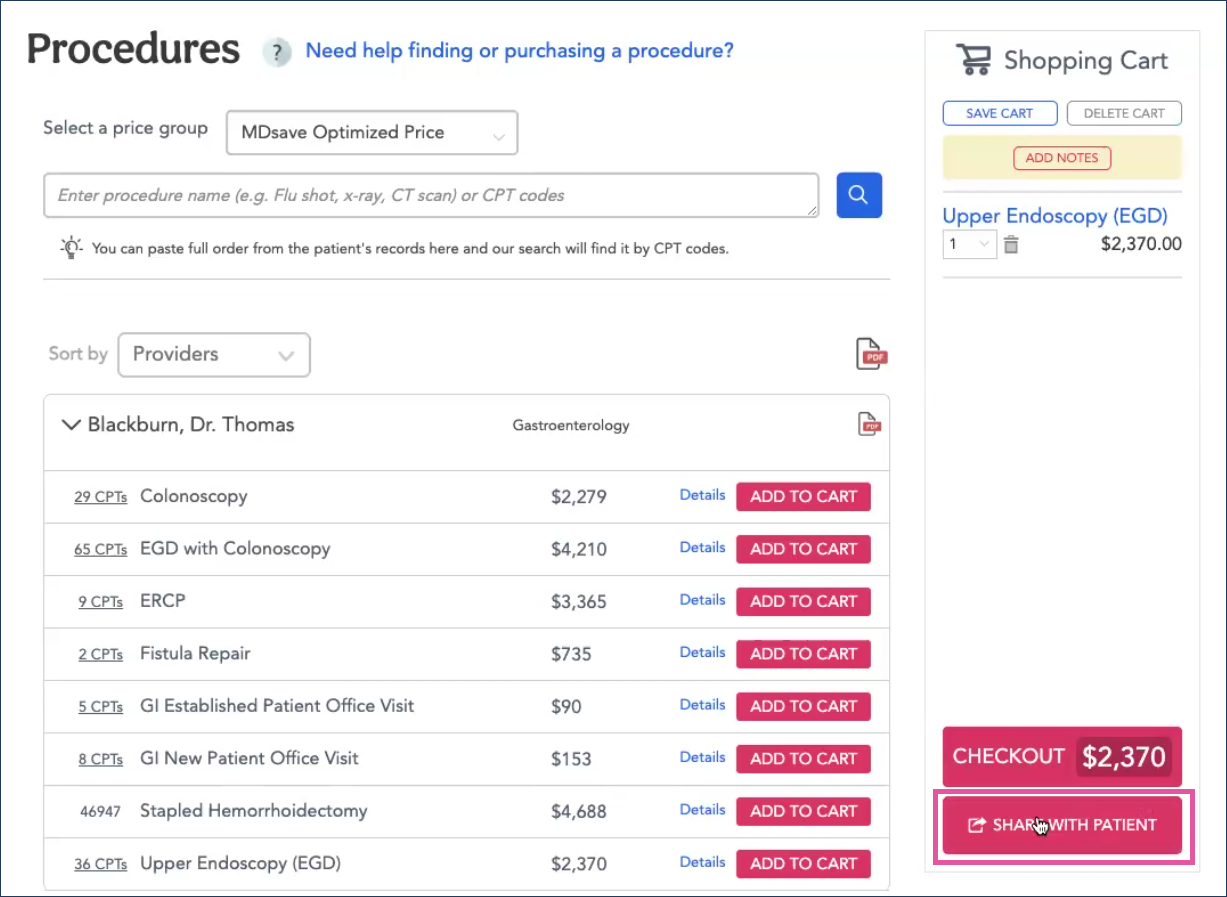
When you have determined the procedure the patient needs to purchase, click the ADD TO CART button on a single procedure’s list or details view or click ADD ALL TO CART for multiple procedures. The procedure(s) will appear in the shopping cart on the upper right of the Procedures page.
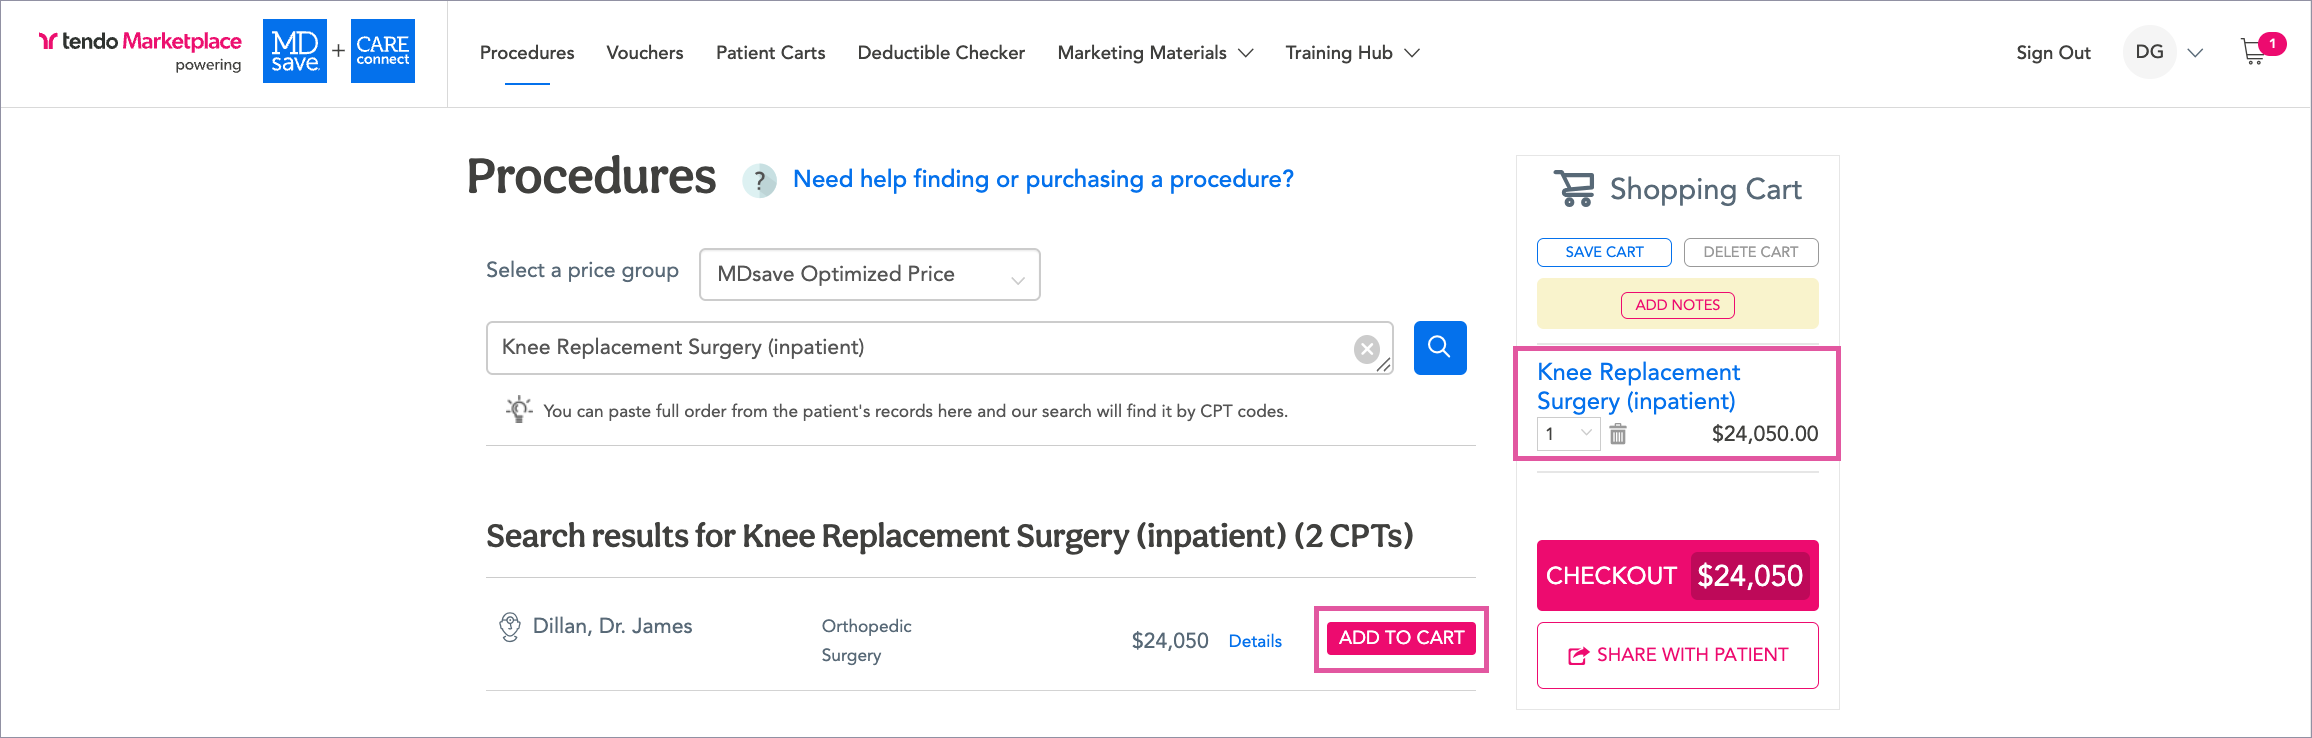
Edit the cart as needed by changing the quantity, adding or removing procedures. You can make changes and add more procedures at any time until purchase.
Check Out
If the patient wants to purchase the voucher for their procedure now, click CHECK OUT.
If the patient exists in the system, search for them in the search bar.
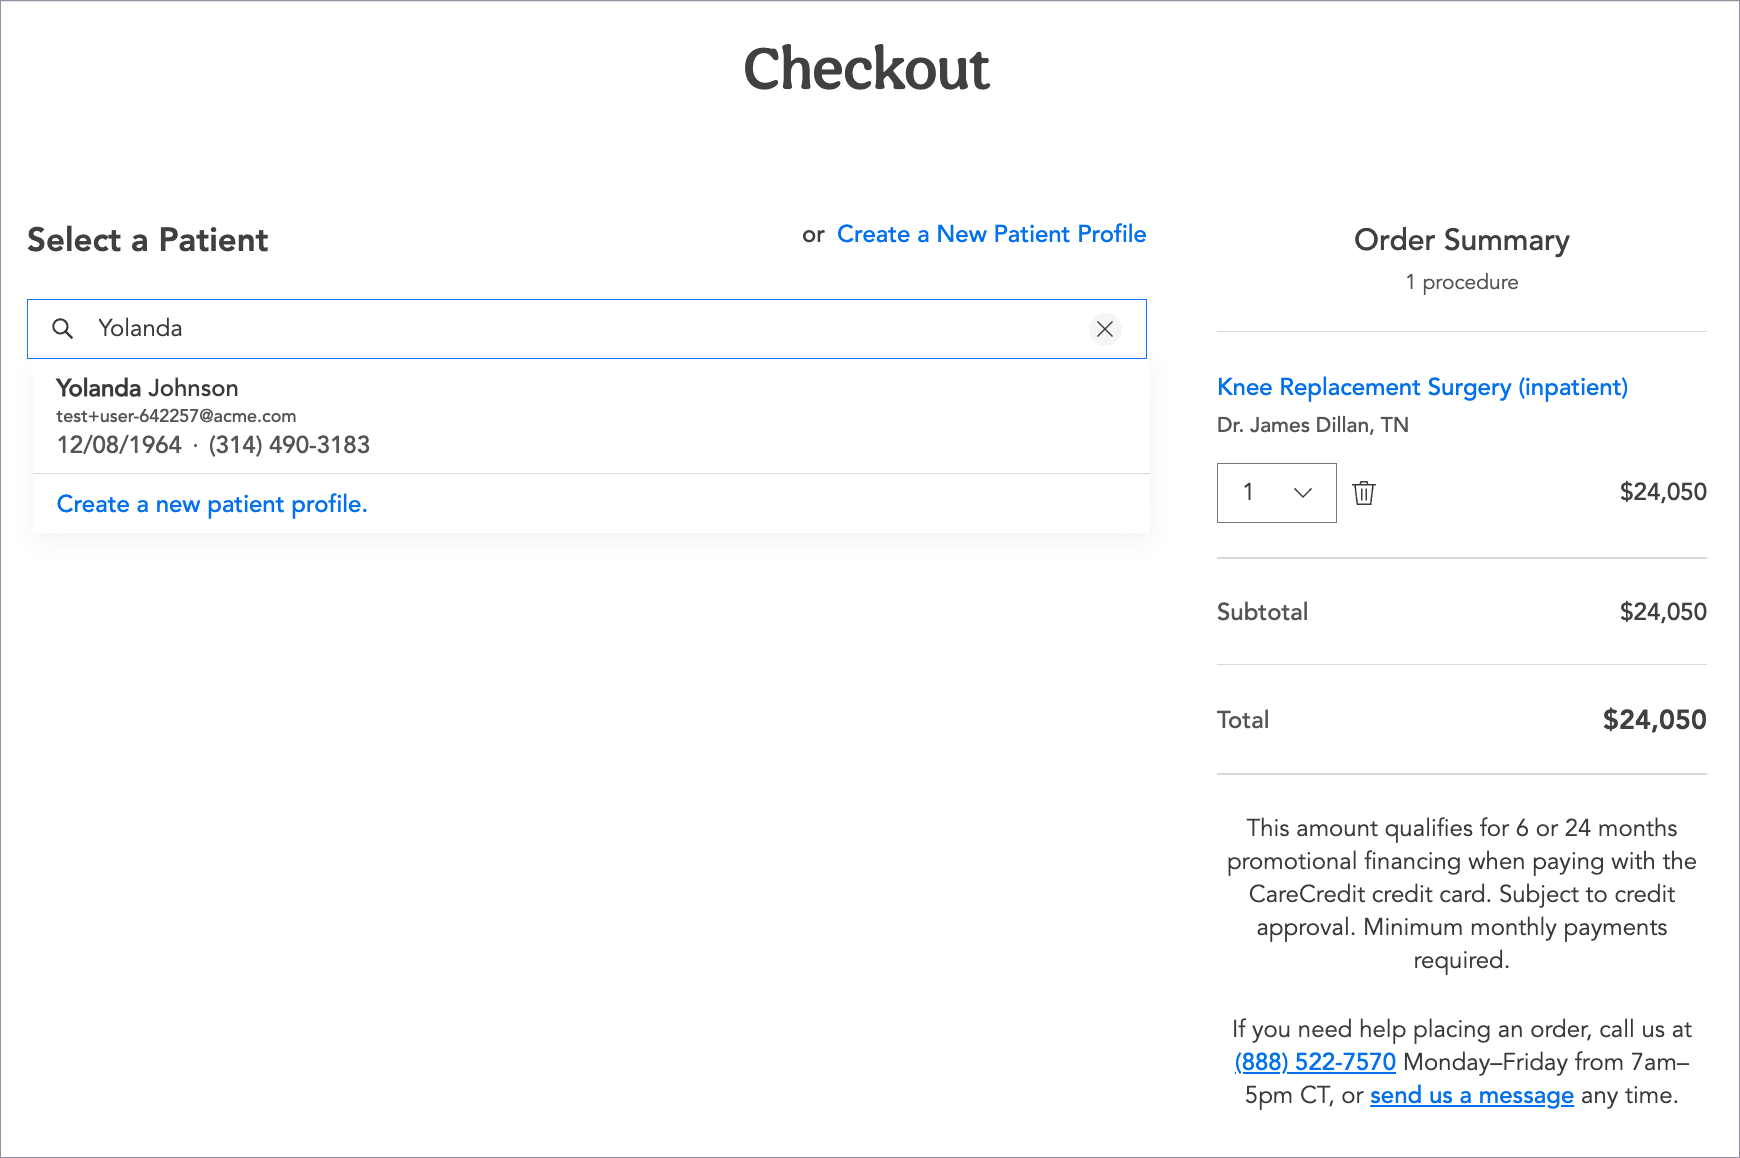
Select the patient to confirm their personal information, work with the patient on appointment scheduling, and confirm the payment method. Click Purchase.

If the patient doesn’t exist in the system, select Create a New Patient Profile. Enter the patient’s personal information, choose an appointment scheduling option, the ordering provider’s name, and the patient’s preferred payment method. Click Purchase.
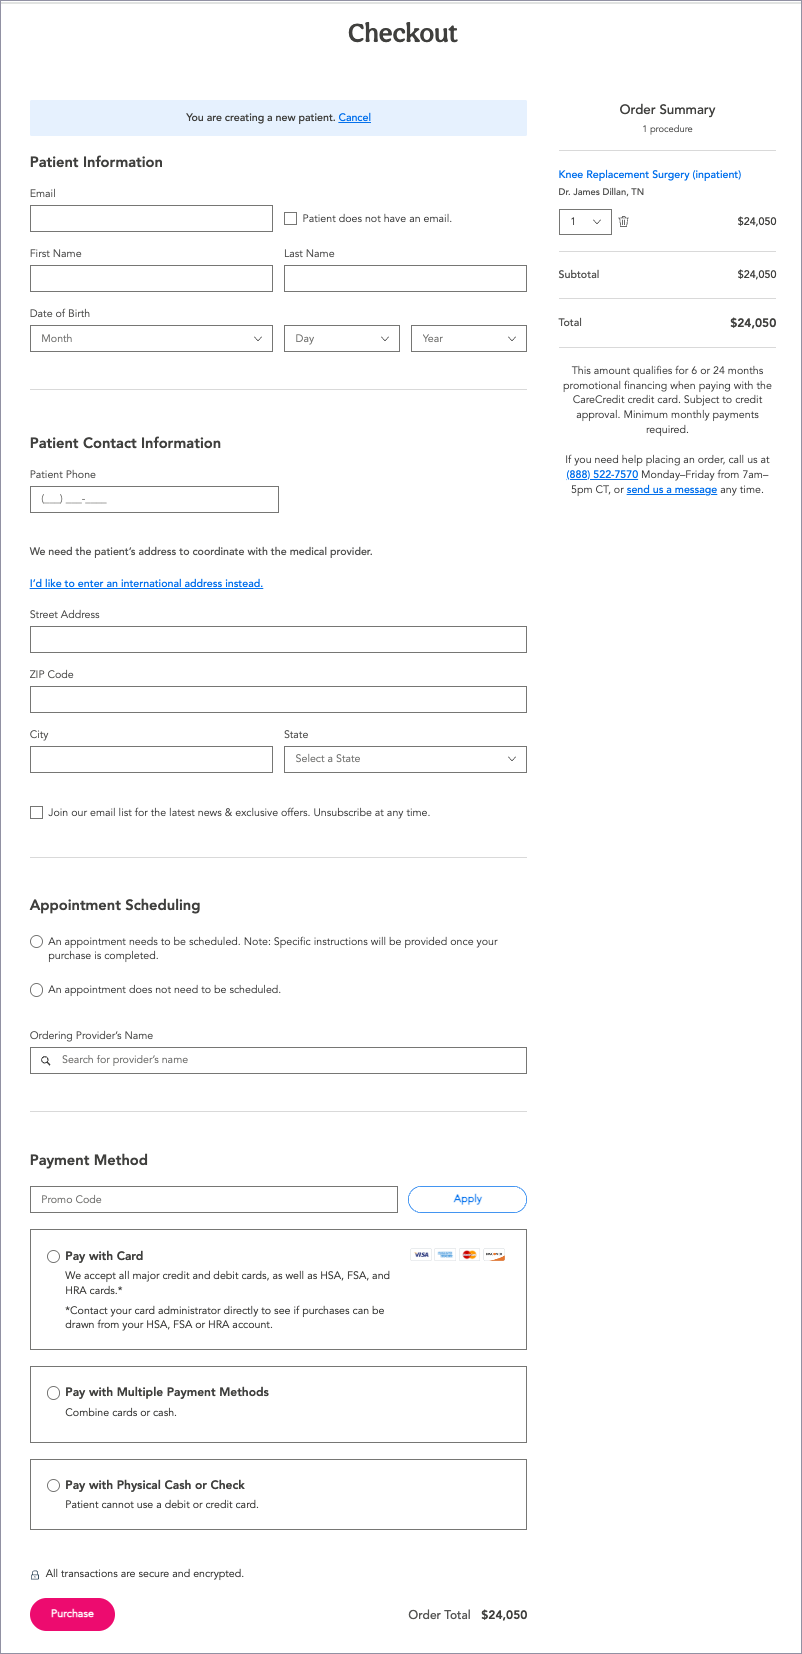
Payment Methods
- Credit/Debit Card - MDsave accepts all major credit cards, as well as Health Savings Account (HSA), Health Reimbursement Arrangment (HRA), and Flexible Spending Account (FSA) cards.
- Cash (if applicable to your facility) - Collect cash or check from the patent and record the amount. MDsave will deduct this amount from your payment report.
- Multiple Payment Methods - Use multiple credit cards or, if applicable, credit cards and cash.
- CareCredit - Tendo Marketplace partners with CareCredit, a health, wellness and personal care credit card, to help patients pay for vouchers over time with promotional financing options and flexible monthly payments available.
- Sharing a Cart - If a patient chooses not to purchase a procedure voucher now and your organization has opted into sharing shopping carts with patients, you can add their procedure to a cart and send it to them so that they can pay for the voucher when they are ready to.
See Patient Payment Methods for more information.
If the procedure was performed on or before the transaction date, you may process the voucher at the time of purchase.
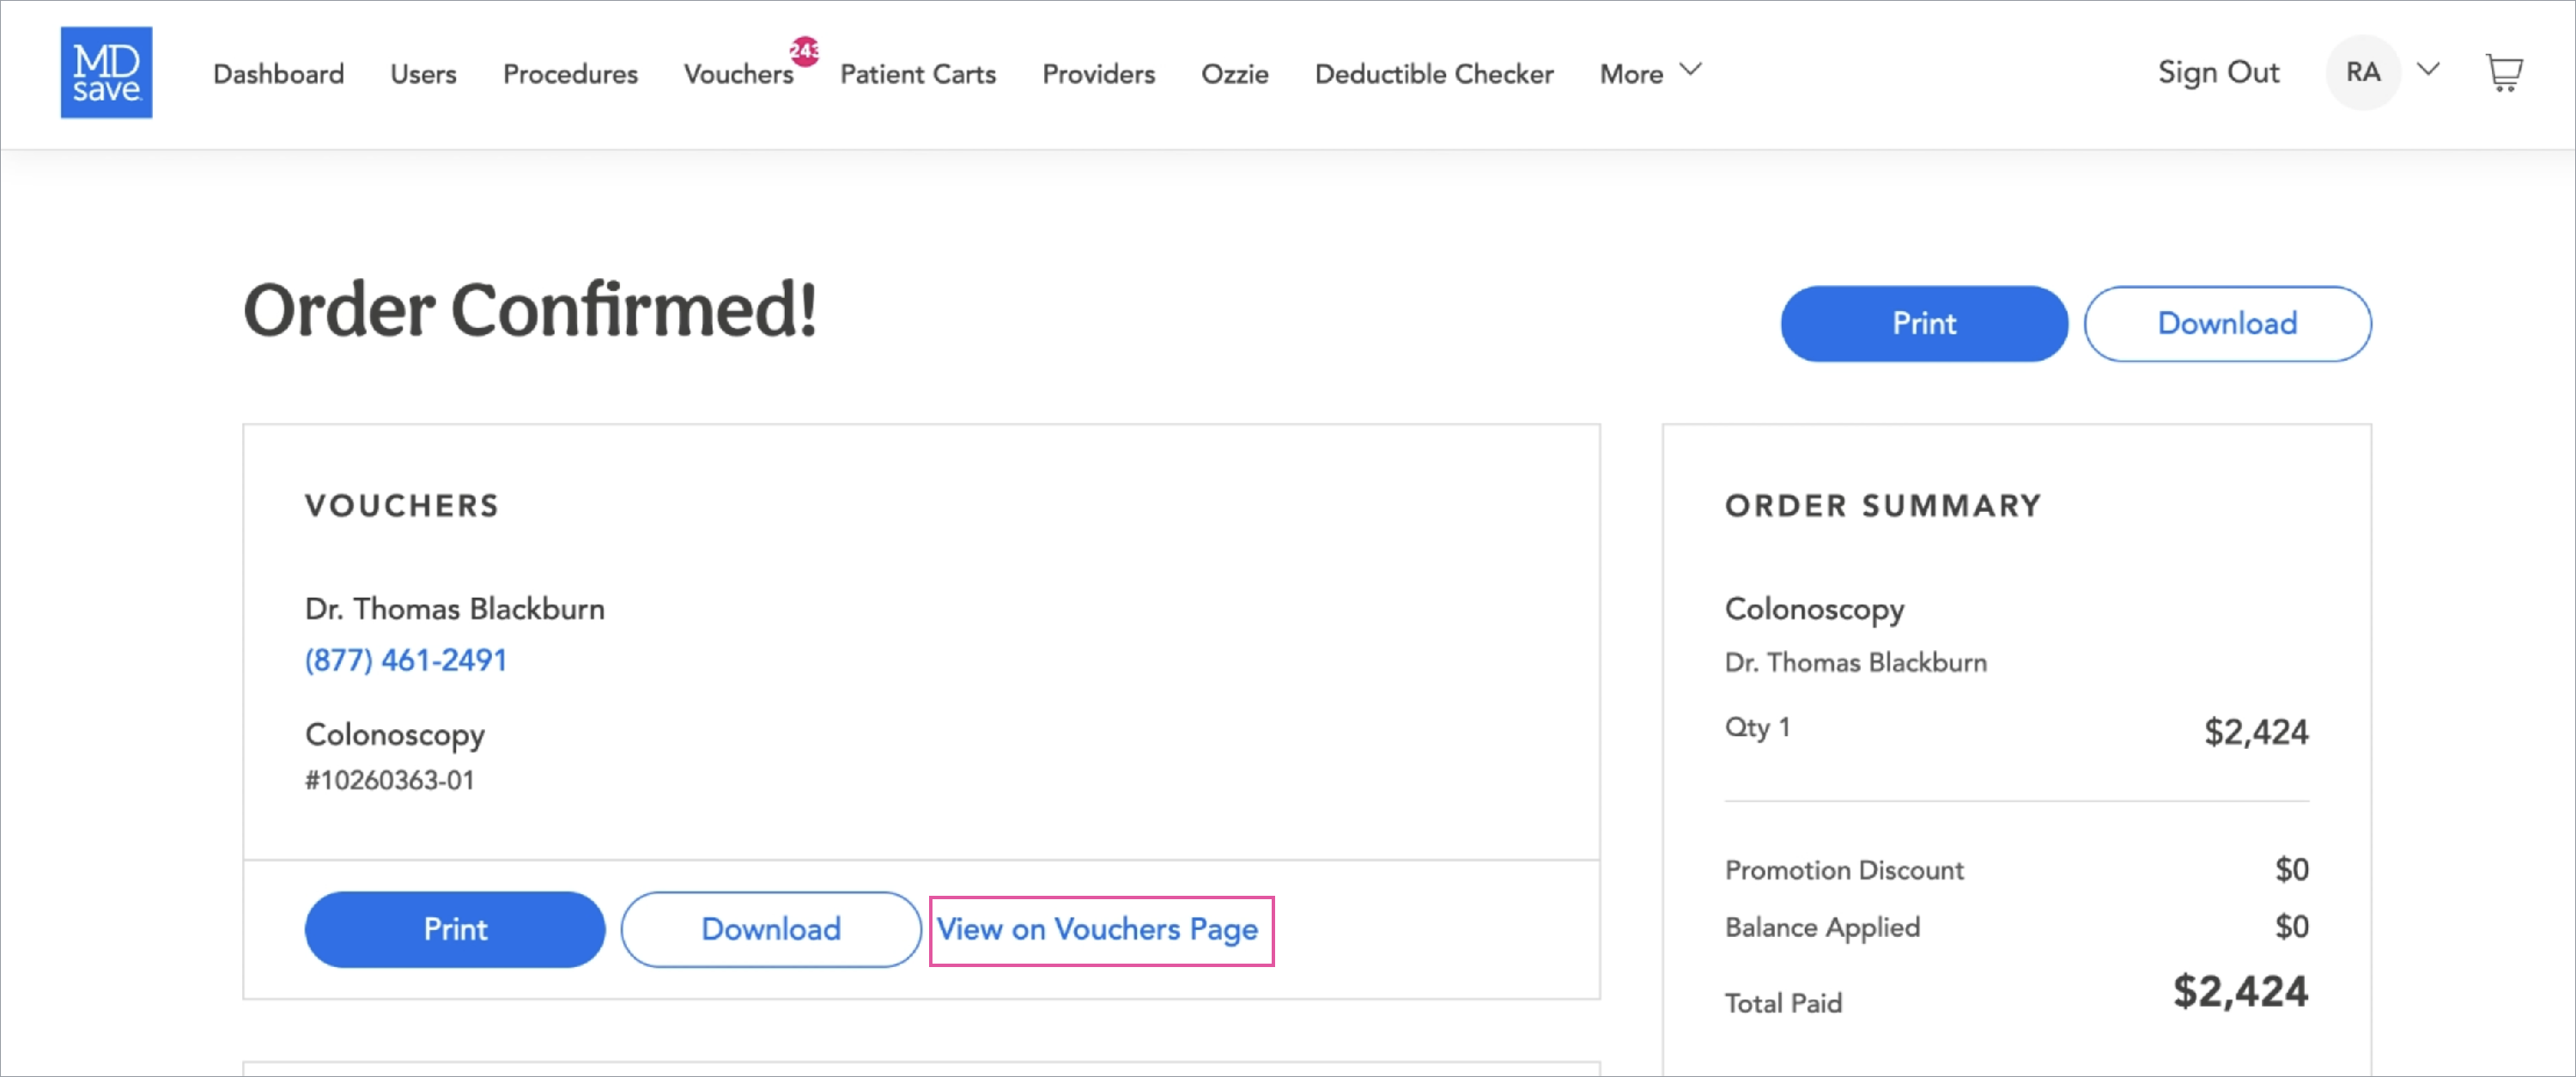
Click Purchase. The Order Confirmed Page will appear. You can print vouchers on this page for patients who request a copy.
If you are helping the patient purchase the voucher at their procedure appointment, you can click Redeem on the Order Confirmed page to redeem the voucher.
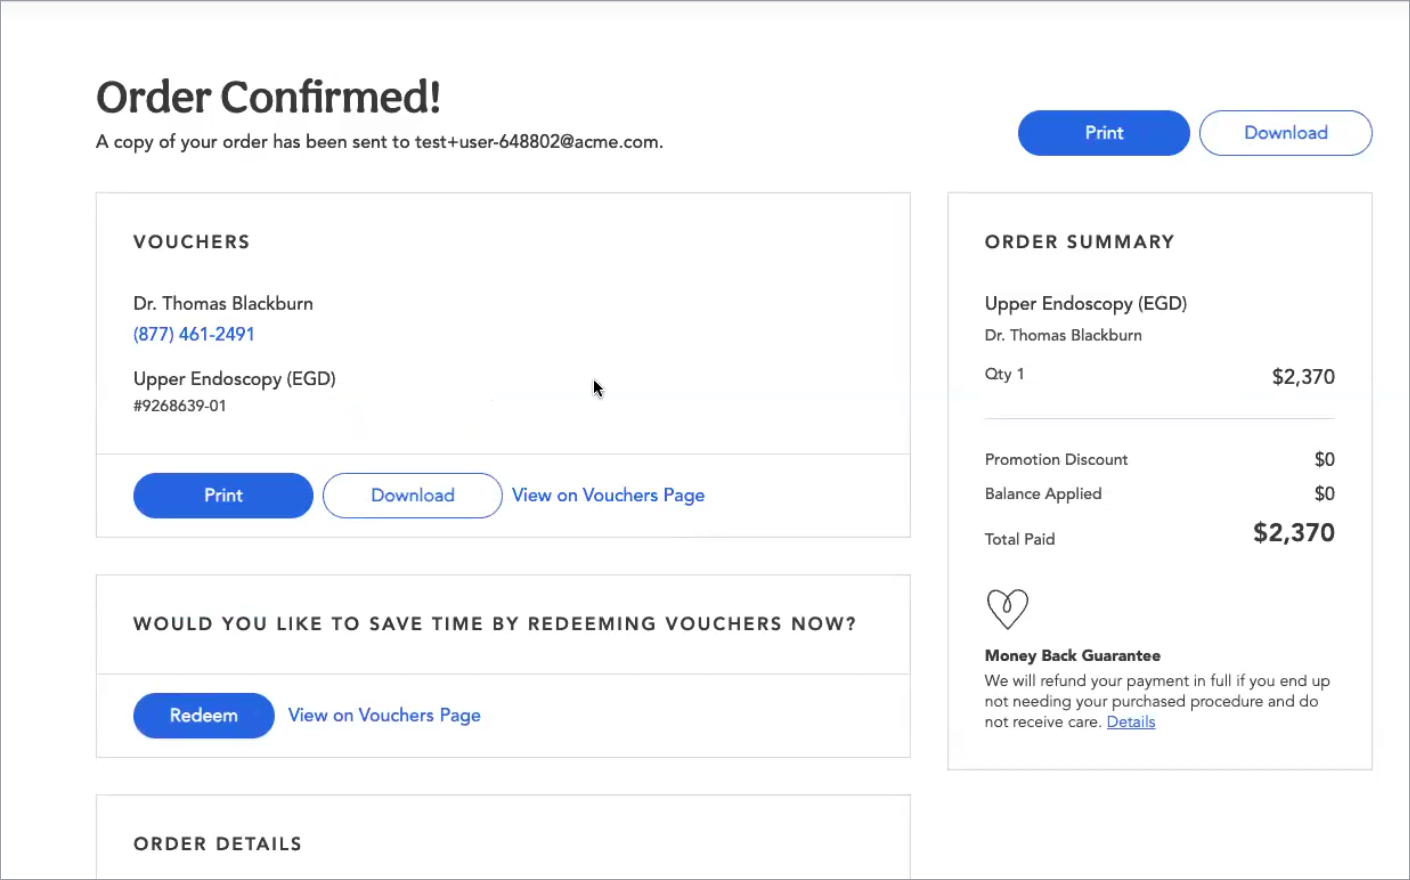
This signals that the procedure has been performed, and it will trigger Tendo Marketplace’s distribution of the funds that the patient has paid out to the providers of the procedure bundle.
Share a Cart With a Patient
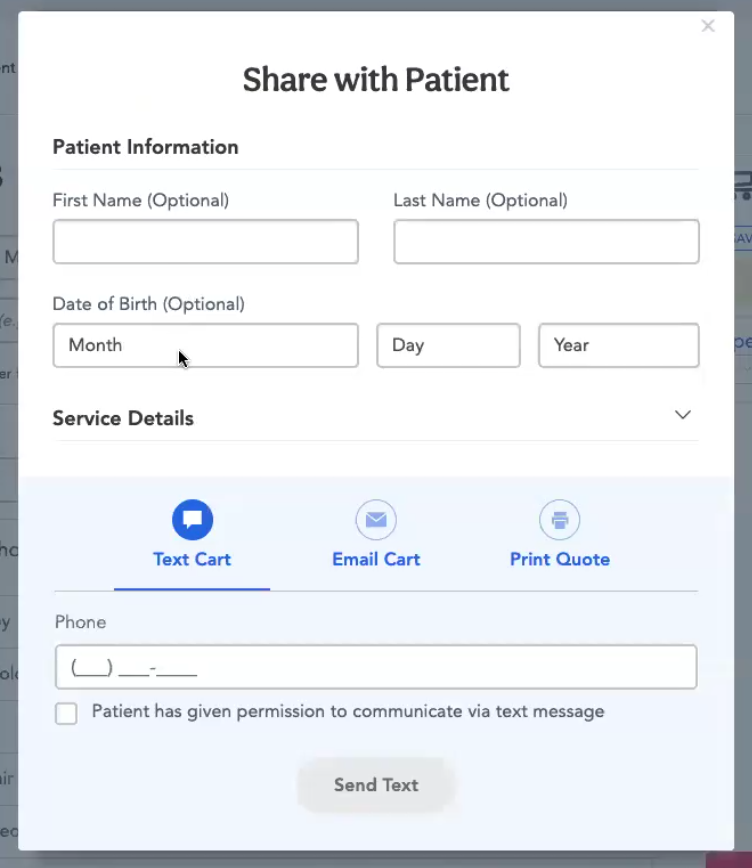
If the patient doesn’t want to purchase now, you can share the cart with them by clicking Share With Patient at the bottom right of the shopping cart.
A popup screen will display in which you can add the patient’s information, and select the way you will share a link to the cart with them - text, email, or printing the quote. For text, enter the patient’s phone number and check the box indicating that they have given you permission to communicate with them via text.
For email, enter the patient’s email, and check whether they have given permission to email them.
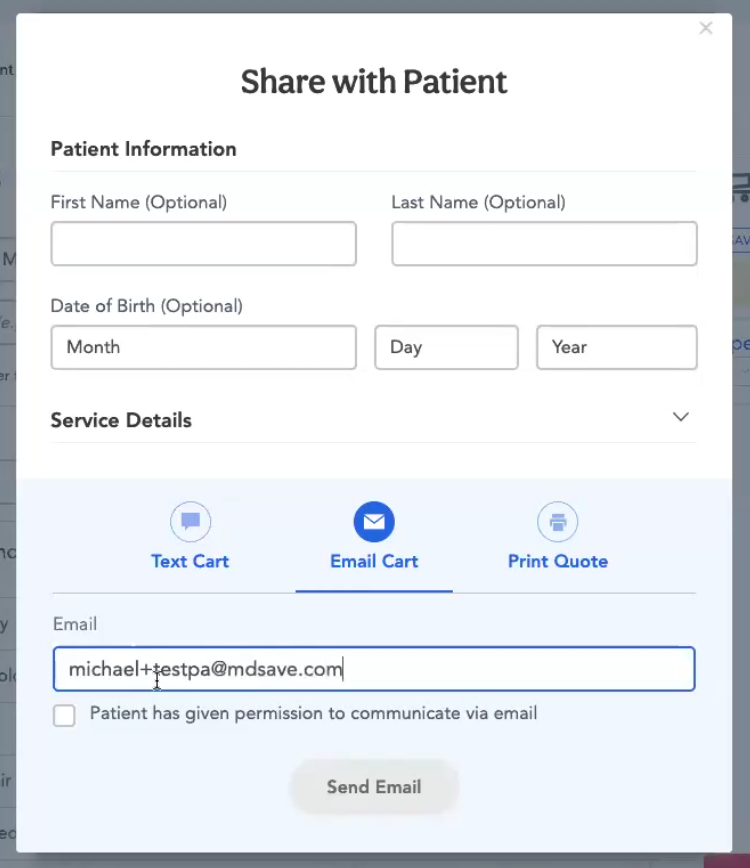
The patient will receive the message with a link to the cart where they can purchase their voucher for the procedure. They can present the voucher number, the voucher on their phone, or print the voucher and present it at their procedure appointment as proof of purchase. After the procedure is performed, your facility can redeem the voucher.
Save a Cart
A cart automatically saves when you share it, so the only time you need to save a cart is if you don't share it with the patient for some reason but want to save it for future reference. Click Save Cart to save the cart so you can send it to them later or review it and send it to them.
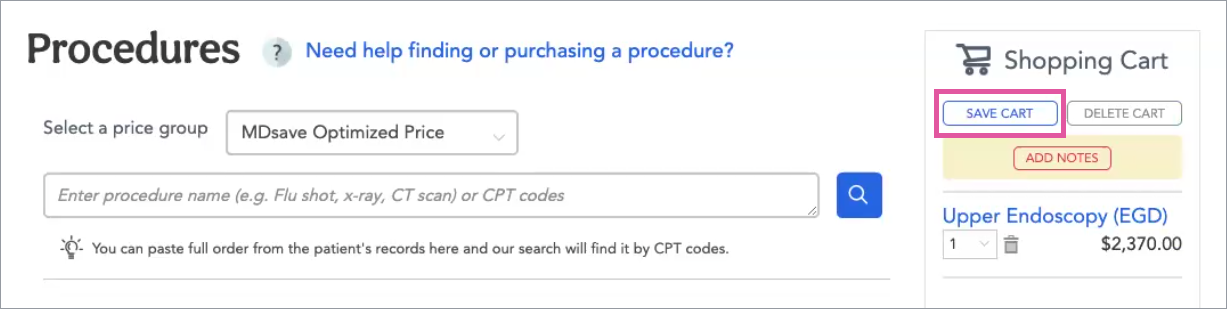
A popup will display.
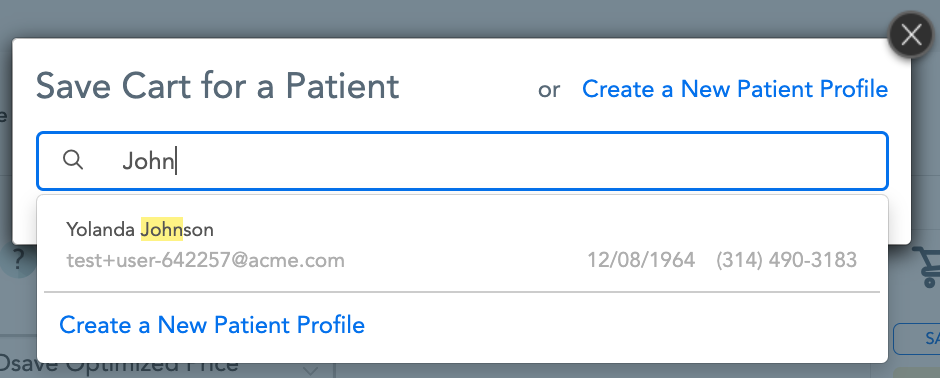
You can search for a patient who is already in the system because they previously purchased a voucher. When you select the patient, a Save Cart for an Existing Patient popup populated with the patient’s information appears.
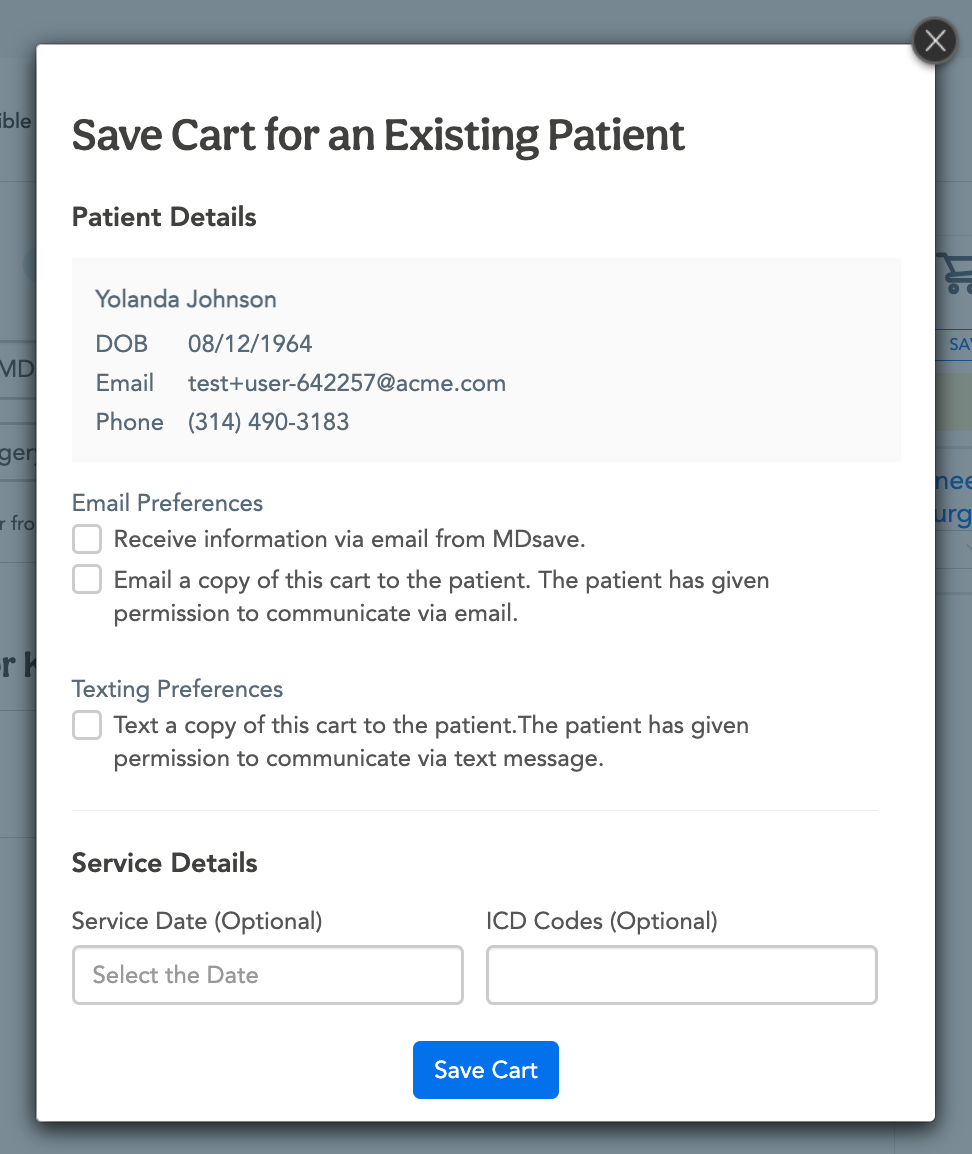
Review the patient details, check email and text preferences and optionally add the Service Date and ICD Codes, then click Save Cart.
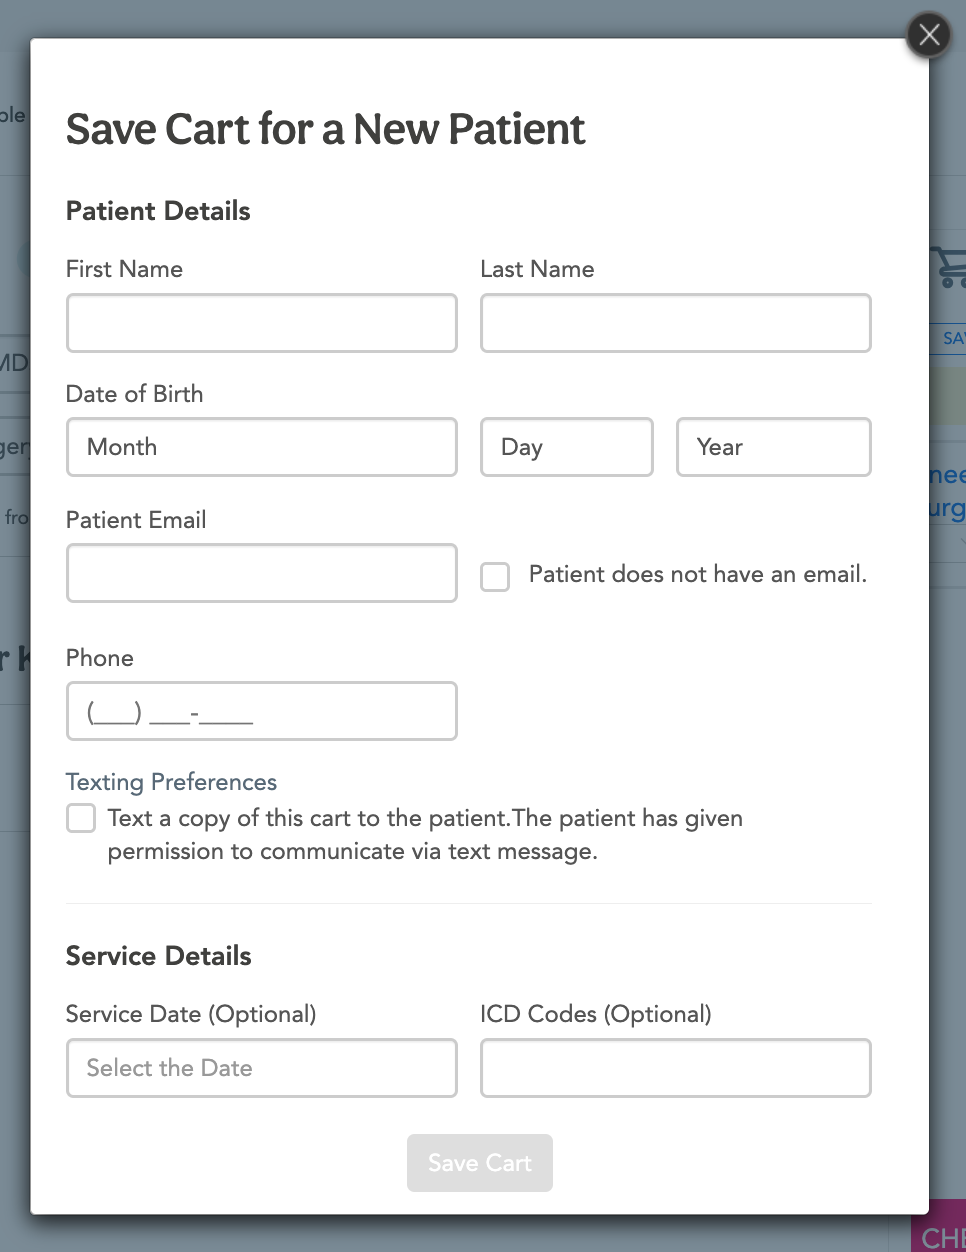
If the patient isn't in the system, click Create a New Patient Profile on the Save a Cart for a Patient popup.
Add the patient’s personal information, check their email and text preferences, and optionally enter the service date and ICD codes. Click Save Cart.
Go to the Patient Cart tab at the top of the page to see the carts that you or other members of your staff have saved or shared. Note that you can’t see a cart here that a patient has created or saved or that a Care Connect navigator has created and shared with a patient.
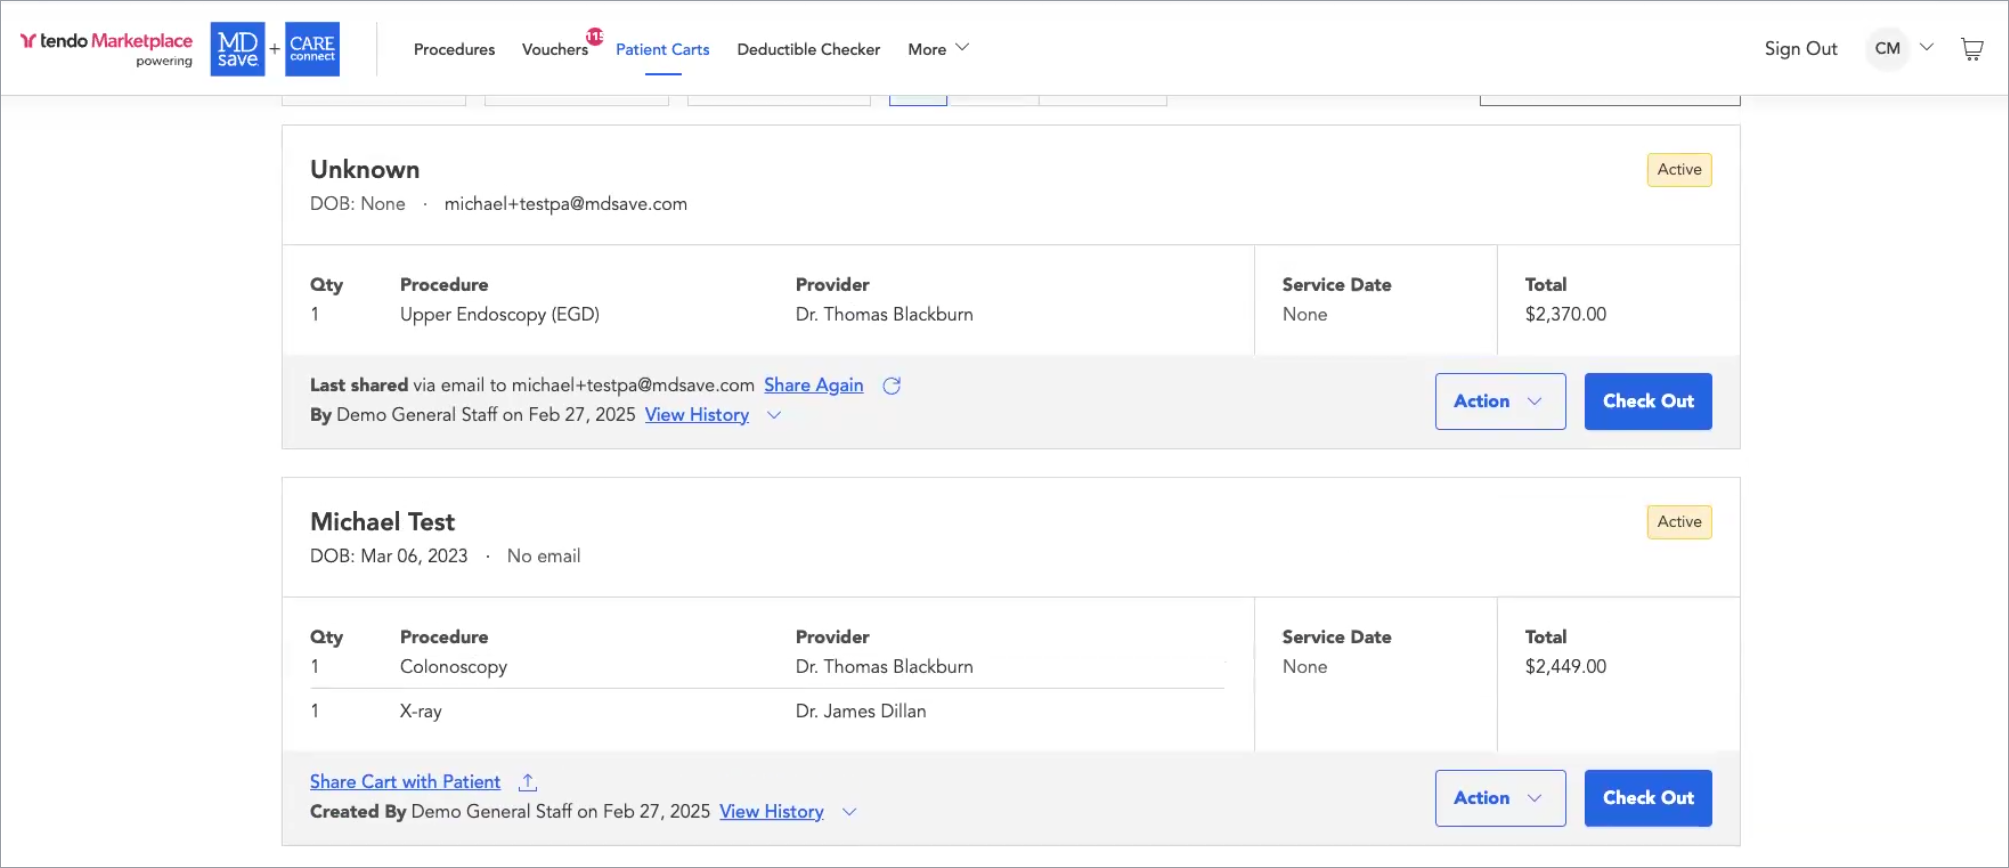
Saving a cart is useful because patients may not want to pay for a cart at the time you create it for them. They may need to wait until they talk to their spouse or wait until the end of the month to get paid before purchasing a voucher in their cart. When they are ready to purchase, you can find their saved cart under the Patient Carts tab and help them purchase their voucher or share the cart with them so that they can purchase the voucher.
Delete Cart
Click DELETE CART on the top right of the shopping cart.
Add Notes
Click ADD NOTES to enter information about the cart’s contents.
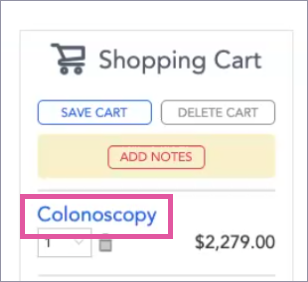
Details about Procedures in a Cart
To review details about a procedure in the cart, click on the procedure’s name.
Actions You can Take on a Saved Cart
To access actions you can take on a saved cart, click the Action button on the right and select an action.
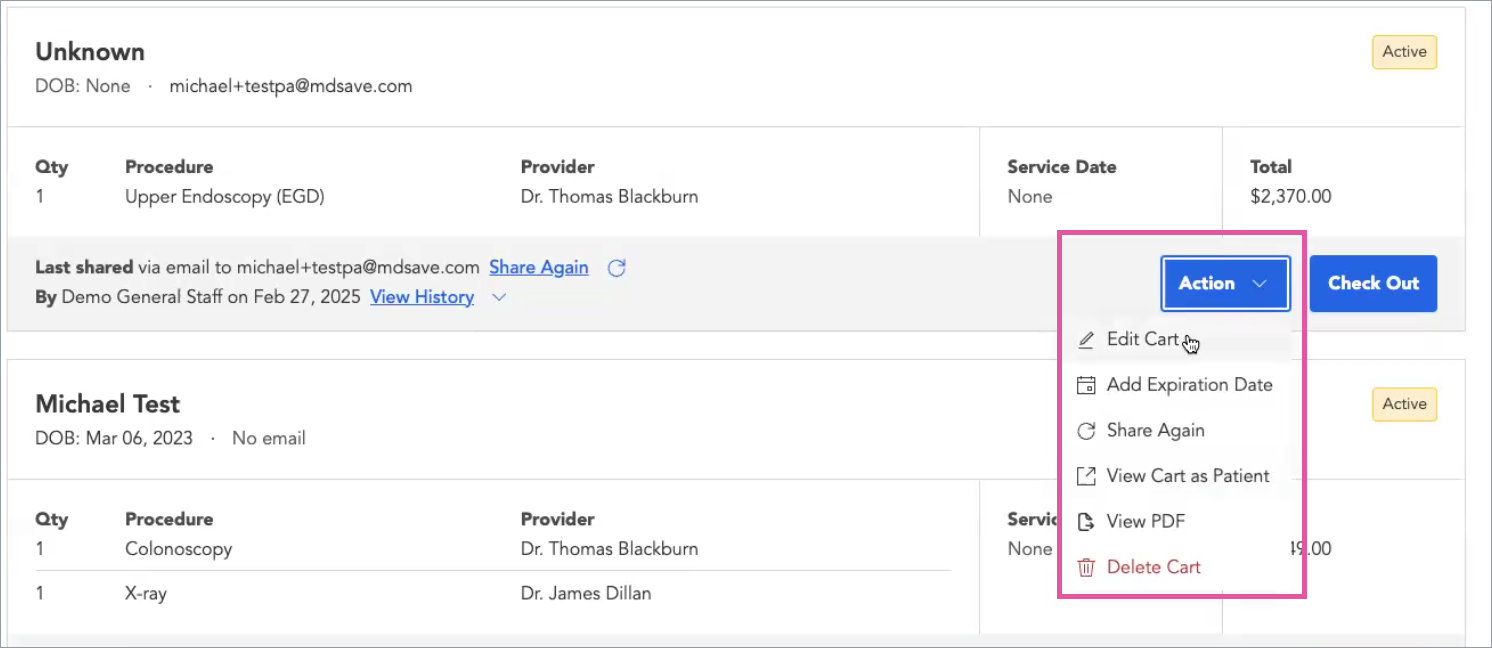
Edit Cart
If procedures have changed, you can edit the cart provided it is unredeemed.
Add Expiration Date
You can add an expiration date to the cart so that the patient will need to buy the voucher by a particular date.
Share Again
You can share the cart with the patient again after you have made changes.
View Cart as Patient
You can view the cart as a patient would see it.
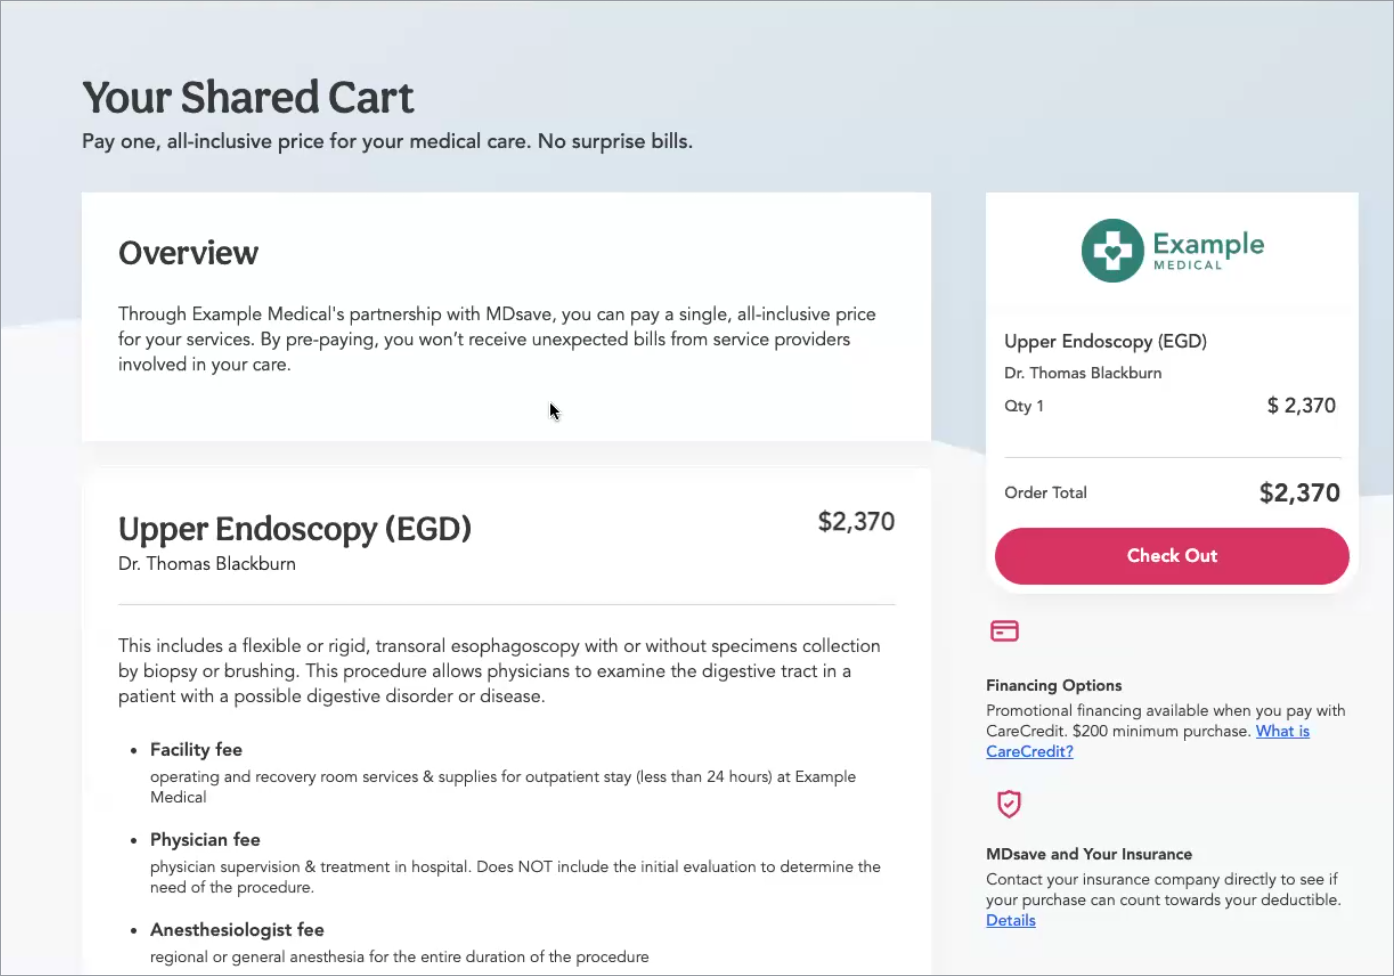
A cart shared with a patient includes what the procedure is and associated services that the voucher includes, and information about the provider. The patient can check out on the cart. They can’t change procedures on their cart and will have to ask the provider staff to change the cart if they need a change before purchase.
View as PDF
Choose this option to view the cart as a pdf.
Delete Cart
You’ll be asked to confirm that you want to delete the cart.
Purchasing a Care Connect Voucher for a Patient
Some of your patients may be employees of companies that have a partnership with Care Connect, but they may not have purchased a voucher for a procedure. If your facility has arranged with Tendo to enable purchasing Care Connect vouchers for selected companies, you can purchase a Care Connect voucher for the patient directly within the Provider interface and bill the company at Checkout.
When this feature is enabled:
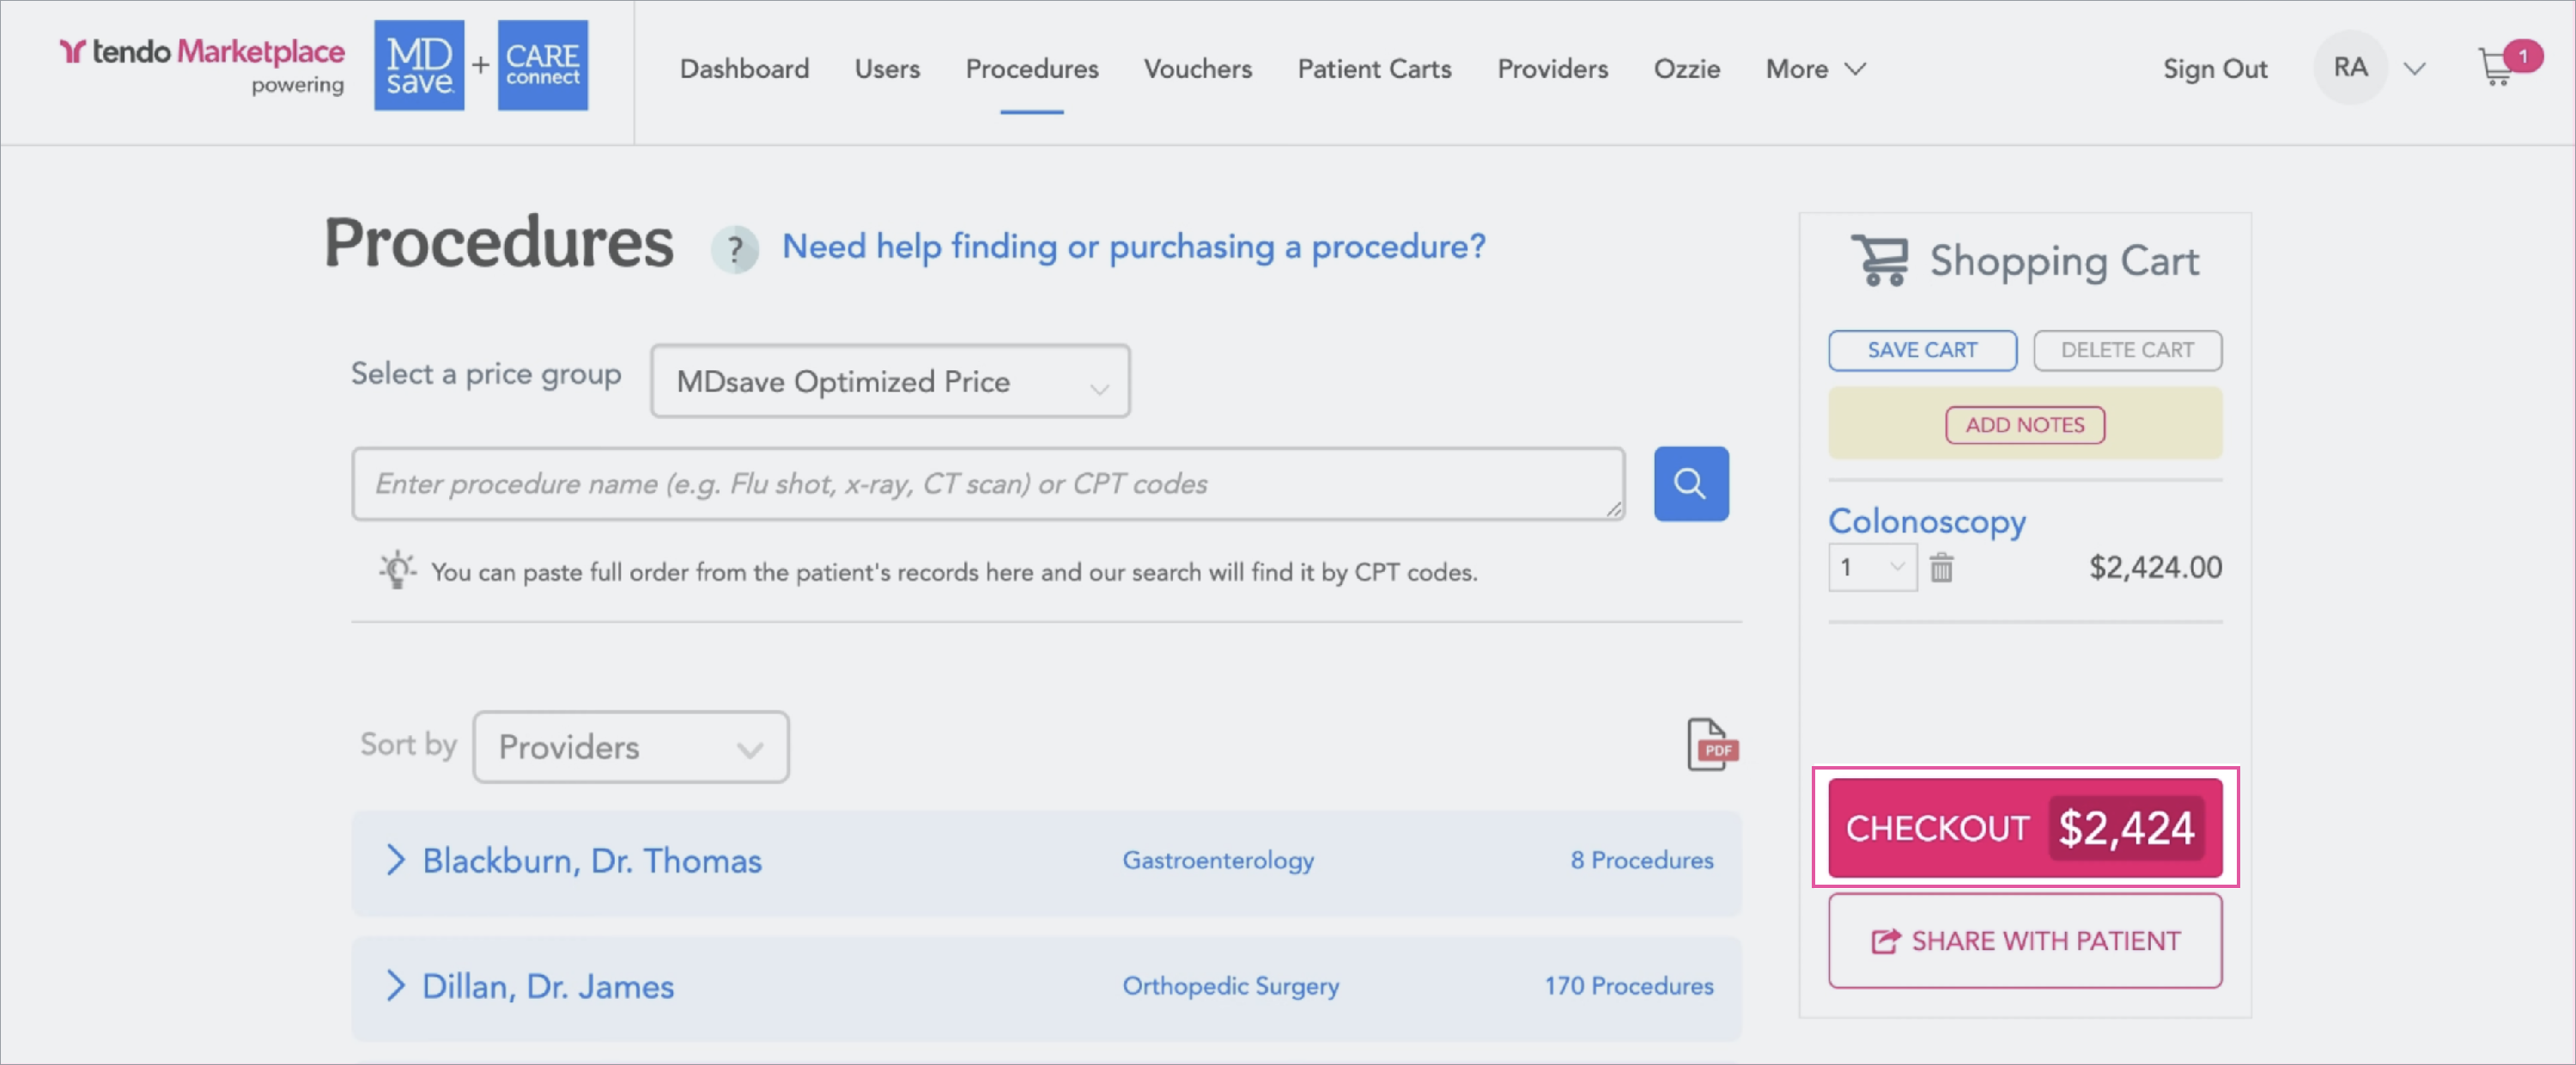
Step 1 - Click Add to Cart on the procedure to create a shopping cart, and click CHECKOUT.
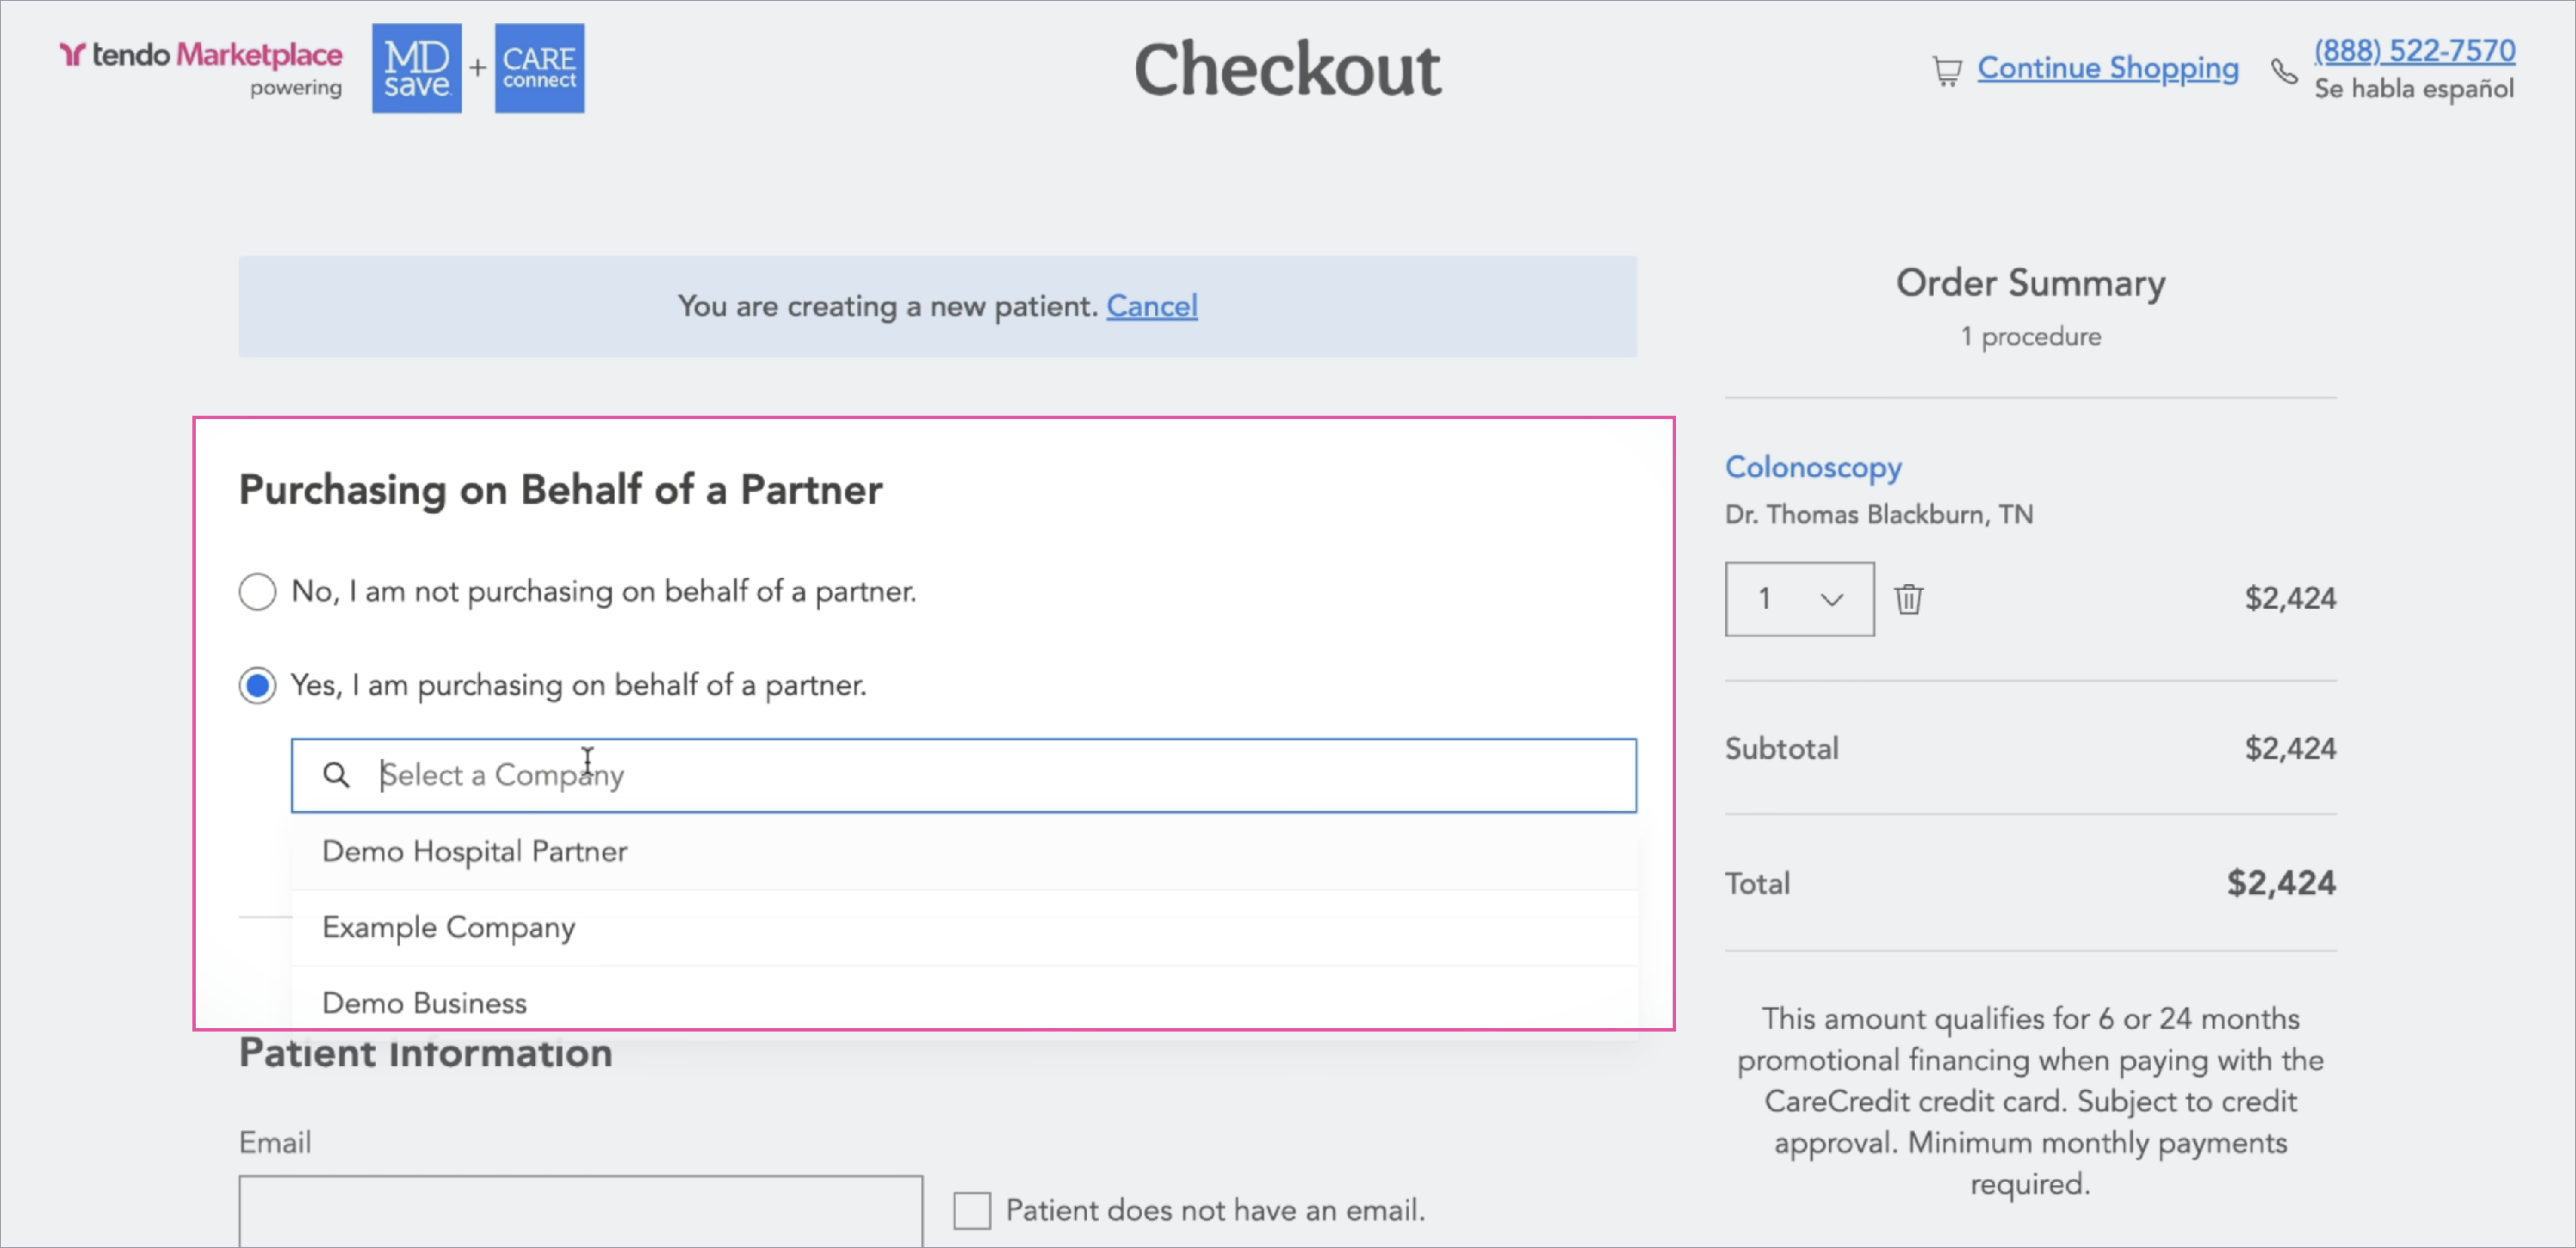
Step 2 - This will take you to the Checkout page, where you will select the patient. In the Purchasing on Behalf of a Partner section, select Yes. Then select the company in the dropdown menu.
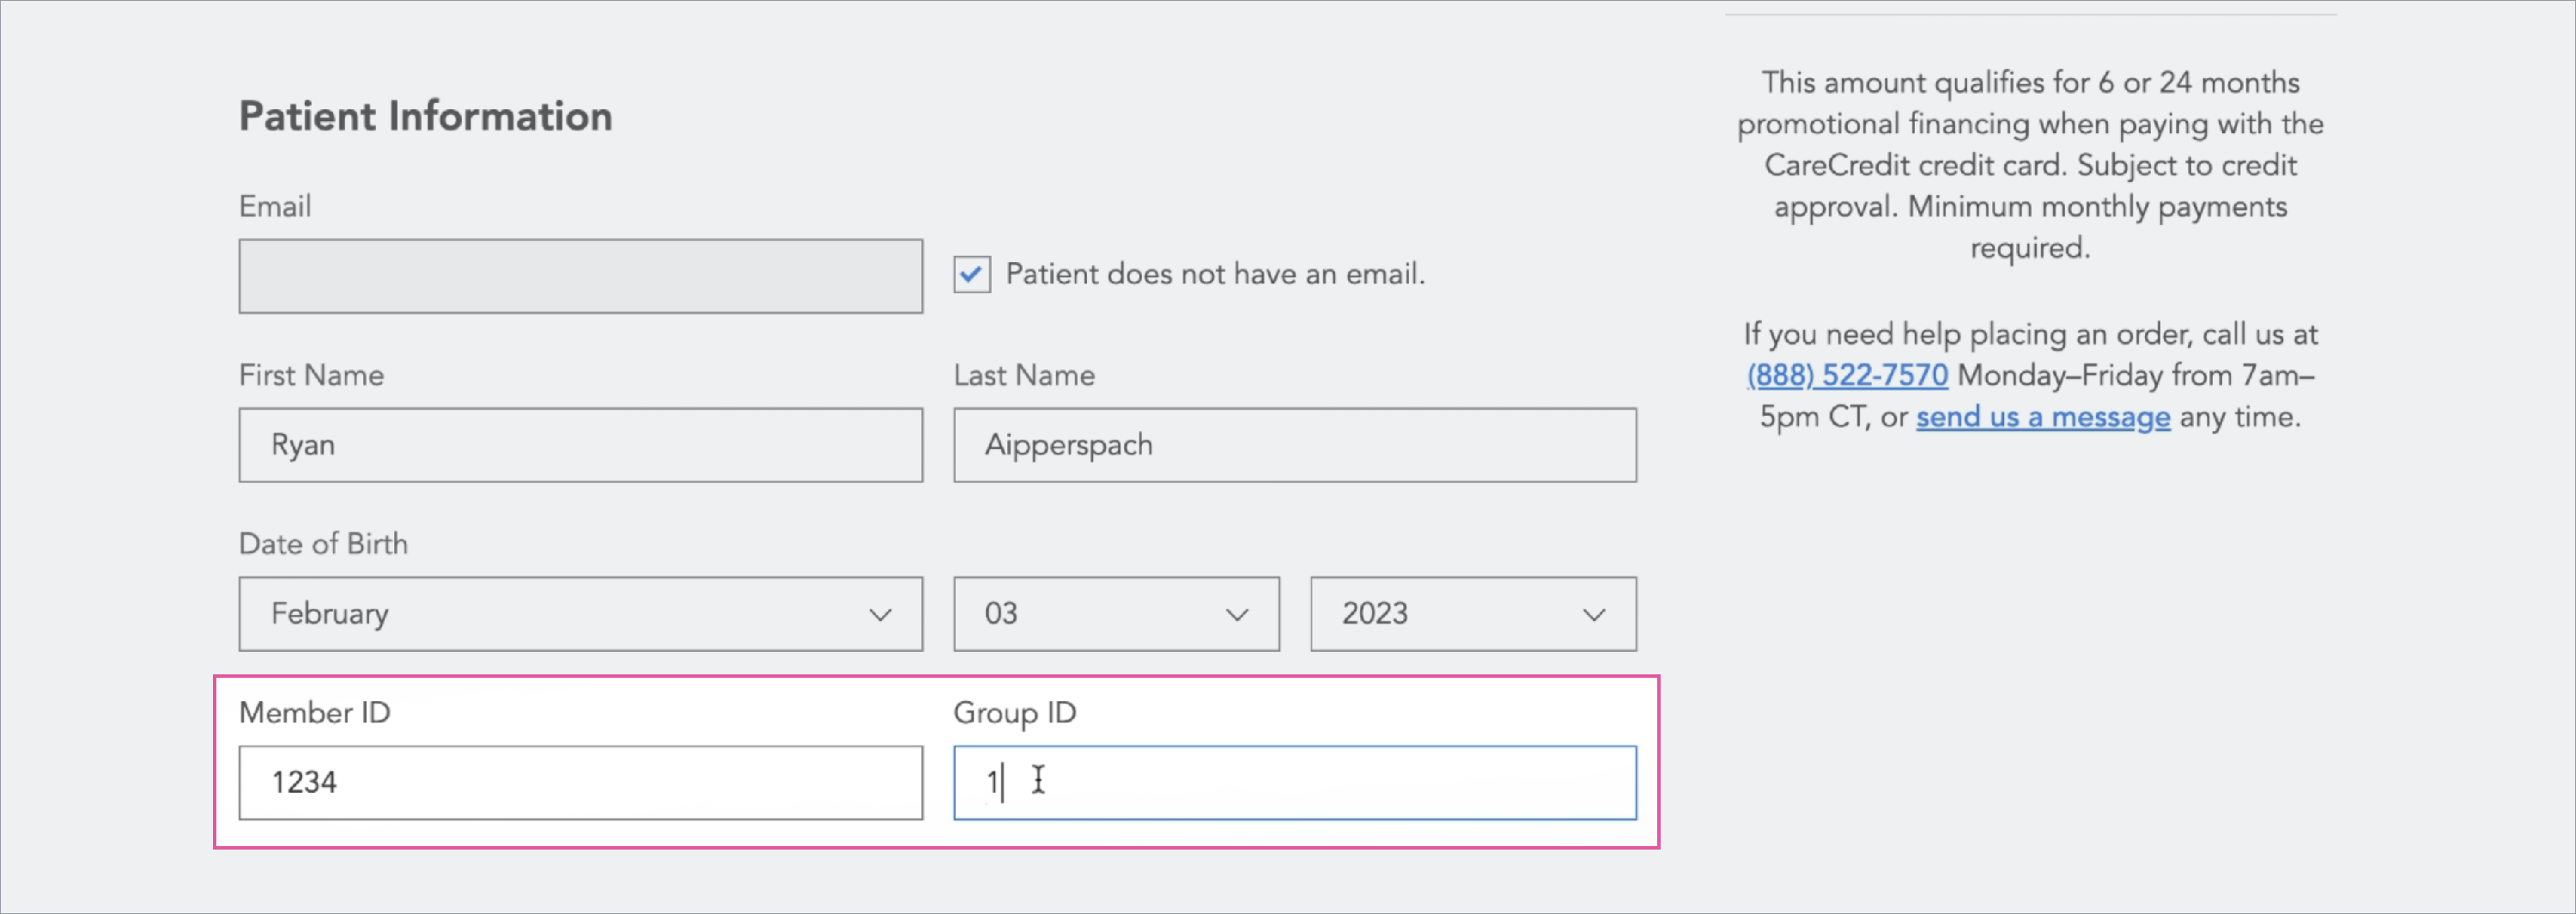
Step 3 - Fill out the patient information. If the employer requires member or group ID numbers, those fields will display so you can enter them.
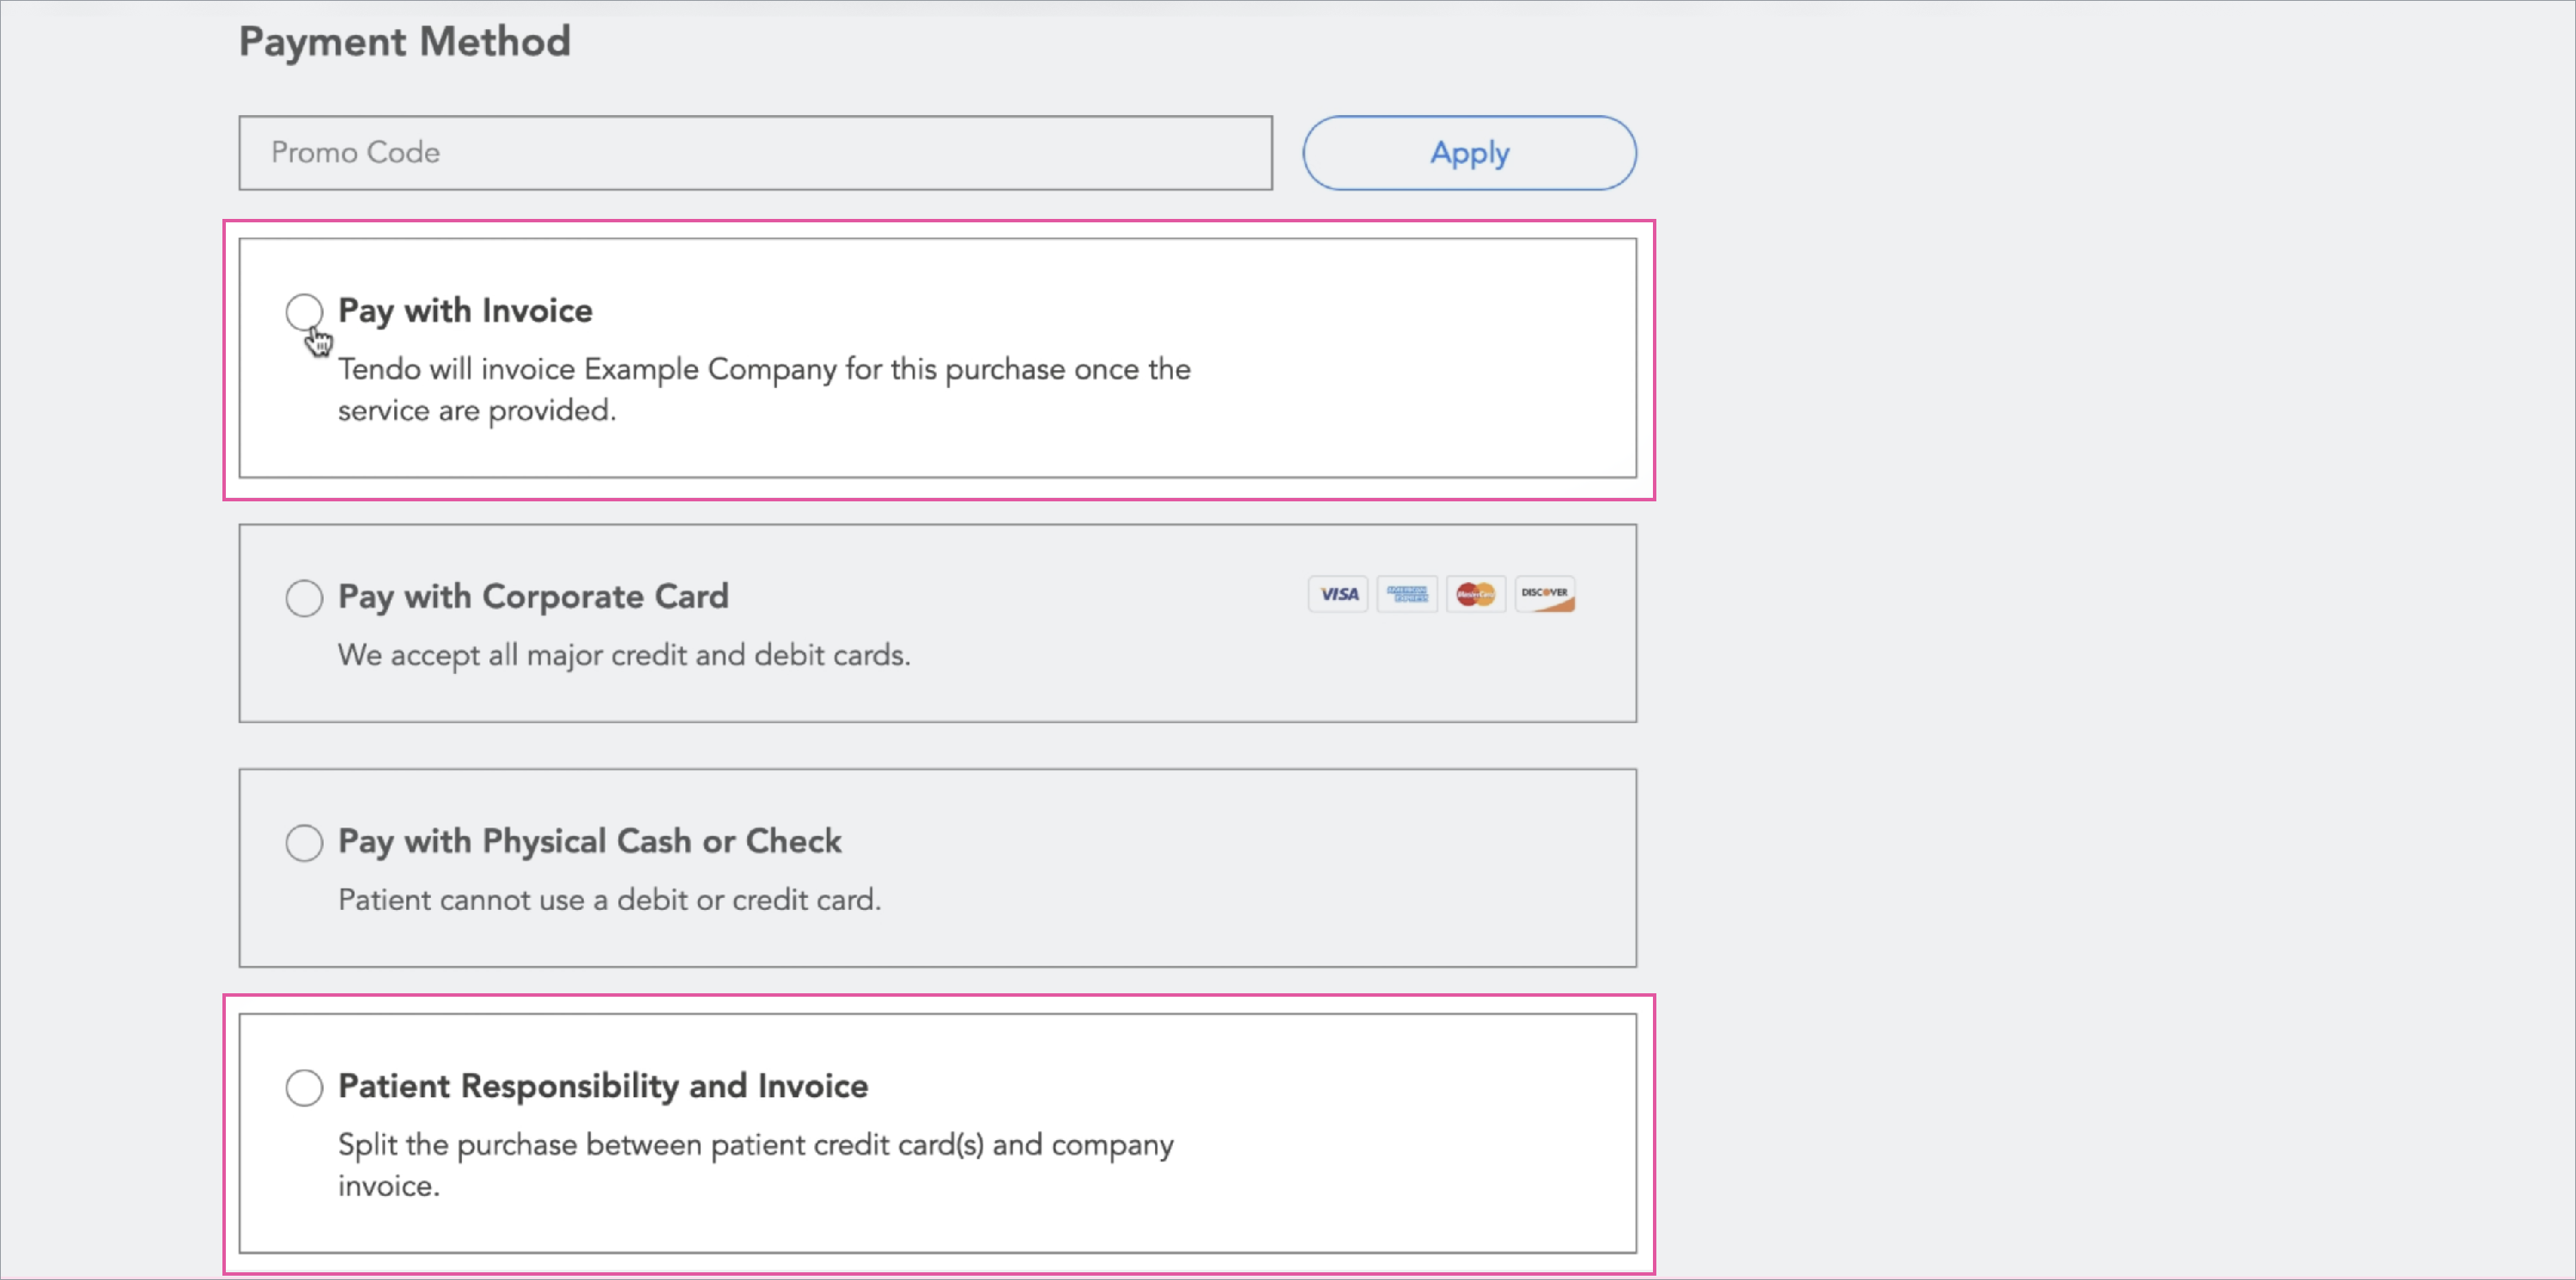
Step 4 - Continue to fill out the form. In the Payment Method section, choose between these options for that employer - Pay with Invoice or Patient Responsibility and Invoice. Click Purchase.
Step 5 - An Order Confirmed page will appear with details of the purchase. To view the voucher, Click View on Vouchers Page.
Step 6 - On the Voucher page, find the voucher you want. Click View Details in the lower right corner of the voucher listing.

Step 7 - The voucher details will expand open, and you can see the voucher payment method.
Note: If your facility hasn't opted to purchase Care Connect vouchers in the user interface or the patient's Care Connect company hasn't authorized your facility to purchase vouchers for them, ask the patient to contact their Care Connect navigator about purchasing a new voucher.